Browsed by
Author: Fred Ray

Soundproofing Walls and Floors in Home Maintenance & Renovations

Soundproofing Walls and Floors in Home Maintenance & Renovations

When it comes to home maintenance and renovations, homeowners often prioritize aesthetics, structural integrity, and energy efficiency. But one aspect that’s often overlooked, yet equally vital, is soundproofing. Whether you’re trying to block out traffic noise, insulate a home office, or prevent sound transfer between rooms, soundproofing walls and floors plays a crucial role in improving comfort and privacy in a living space. Modern living demands a peaceful environment—and investing in soundproofing during renovations is a smart move that pays off in everyday tranquility.

Why Soundproofing Matters

Sound travels through walls, ceilings, and floors more easily than many realize. In urban environments or multi-family housing units, outside noise can become a persistent intrusion. Even in suburban homes, internal noise—like footsteps, television, music, or conversations—can disturb relaxation or productivity.

Soundproofing isn’t only about luxury or comfort. It contributes to mental wellness, helps with concentration, and fosters better relationships by reducing tensions caused by noise complaints. For families with small children, shift workers, or remote professionals, managing acoustics through home renovation becomes a necessity rather than a choice.

Understanding How Sound Travels

Before diving into the methods of soundproofing, it’s helpful to understand how sound operates within a home. There are two main types of sound transmission: airborne and impact.

Airborne sound includes voices, music, and television—noise that moves through open air and passes through walls and gaps.

Impact sound is caused by physical contact, such as footsteps on a floor, a door slamming, or furniture moving. These sounds travel through solid structures.

Effective soundproofing solutions depend on addressing both types, especially in walls and floors, which are primary transmission paths in most houses.

Soundproofing Walls: Techniques for Quiet Interiors

Walls serve as the boundaries between rooms and between the house and the outside world. Renovating with soundproofing in mind allows for permanent solutions that are both effective and discreet.

  1. Add Mass to Walls

One of the most fundamental soundproofing principles is to increase mass. Heavier materials resist sound vibrations more effectively. During renovations, homeowners can add extra drywall layers to existing walls. A particularly effective method is to use soundproof drywall, which contains a gypsum core layered with sound-damping polymers.

Inserting mass-loaded vinyl (MLV) between drywall layers adds another effective barrier. This dense, flexible material is designed specifically for blocking sound without taking up too much space.
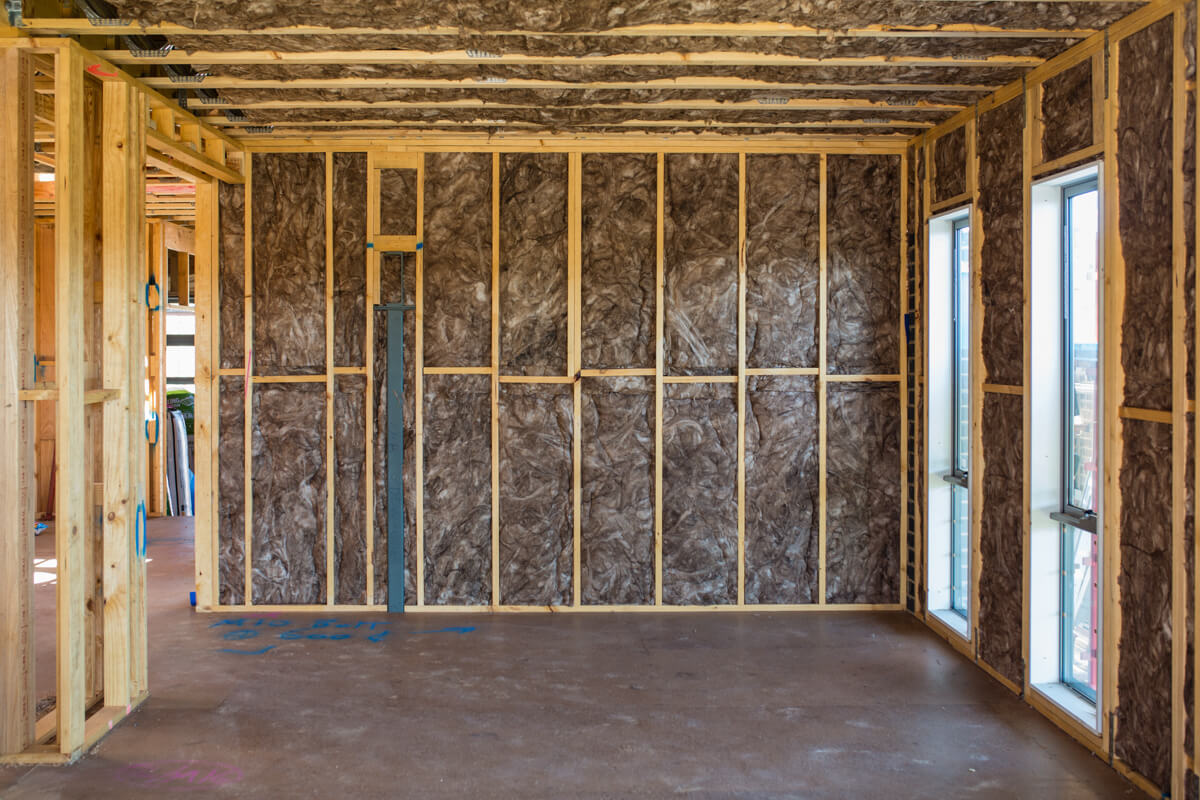


  1. Use Resilient Channels or Sound Clips

If you’re opening up walls during renovation, installing resilient channels or sound isolation clips can make a substantial difference. These components decouple the drywall from the wall studs, preventing sound vibrations from transferring through the structure. Think of it as creating a floating wall layer that absorbs rather than transmits noise.

  1. Insulate the Cavity

Filling the wall cavity with dense insulation is another critical measure. Fiberglass or cellulose insulation is a good start, but rock wool insulation (also known as mineral wool) performs much better in terms of sound absorption due to its higher density. This material also has the added bonus of being fire-resistant.

  1. Seal the Gaps

Even the smallest cracks and gaps around outlets, baseboards, and joints can let sound sneak through. Use acoustic caulk to seal around electrical boxes, window frames, and where drywall meets other surfaces. It remains flexible, so it doesn’t crack over time like regular caulk might.

Soundproofing Floors: Reducing Impact and Airborne Noise

While walls carry sound horizontally, floors are conduits for both airborne and impact sound—especially in multi-level homes or apartment units. Footsteps, dropped objects, and moving chairs can all be disruptive.

  1. Underlayment Installation

One of the best solutions during renovations is installing acoustic underlayment beneath flooring. These materials, typically made from rubber, cork, or foam, absorb impact sounds before they reach the structure. They’re especially useful under hard flooring like tile, laminate, or hardwood, which don’t naturally absorb sound.

  1. Floating Floor Systems

Floating floors are built over an underlayment, with the flooring not nailed or glued directly to the subfloor. This disconnect helps reduce impact noise. Popular in modern renovations, they can be made from engineered wood, laminate, or even luxury vinyl planks. The combination of a floating floor and acoustic underlayment is a powerful soundproofing duo.

  1. Carpeting and Rugs

While not a permanent part of construction, adding area rugs or fully carpeting floors significantly helps with noise reduction. For even better results, combine rugs with soundproof rug pads, which can reduce both echo and impact noise. If your renovation leans toward hard flooring, consider using rugs in high-traffic areas to absorb sound energy.

  1. Joist Cavity Insulation

For homes undergoing deeper renovations where floor joists are exposed, installing insulation between them can go a long way in stopping sound. Similar to wall cavities, use mineral wool or dense fiberglass batts to fill the space between levels. It’s an often-overlooked measure that makes a big difference.

Integrating Soundproofing into Broader Renovation Goals

Soundproofing doesn’t have to be a standalone task—it can easily be incorporated into broader home maintenance or renovation projects. For instance, if you’re already upgrading your HVAC system, it’s an ideal time to install quieter ducts and insulate them to avoid the whooshing sound of airflow. Similarly, if you’re redoing drywall, it’s the perfect moment to double up on panels or install resilient channels.

Moreover, while soundproofing adds value in terms of comfort, it also contributes to increased property value. Homebuyers are increasingly looking for homes that offer peace and quiet, particularly in bustling neighborhoods. So the up-front cost of soundproofing often translates to long-term financial and lifestyle rewards.
Choosing Materials and Professionals

Like any renovation, the success of your soundproofing project depends on the quality of materials and the skills of those who implement them. Acoustic materials can vary widely in cost and effectiveness, so working with knowledgeable contractors or consultants is a wise move. Some renovations can be DIY-friendly, like installing acoustic panels or caulking gaps, but deeper interventions such as wall reconstruction or floating floors are best handled by professionals.

Research brands and look for products labeled for acoustic performance. Some well-known solutions include Green Glue (a damping compound), QuietRock (soundproof drywall), and Roxul Safe’n’Sound (mineral wool insulation).

Cost Considerations

Cost is always a consideration when planning home maintenance or renovation work. Soundproofing can range from modest (a few hundred dollars for basic caulking and insulation) to more substantial investments (thousands for full wall rebuilds or floor system upgrades). The key is to balance budget with desired outcome. A home office may warrant more extensive measures than a guest bedroom, for instance.

Prioritizing key rooms—like bedrooms, media rooms, home offices, or shared walls—can help spread out the investment over time while still making tangible improvements in quality of life.

A Quieter, More Comfortable Home

Soundproofing walls and floors during home maintenance and renovations isn’t merely about blocking noise—it’s about crafting a sanctuary. A home that feels private, peaceful, and quiet is one that promotes rest, productivity, and overall happiness. As open floor plans and urban density continue to shape modern living, the need for effective sound management grows.

Whether you’re starting a full remodel or just tackling one room at a time, don’t underestimate the impact of strategic soundproofing. With thoughtful planning and the right materials, your home can become a place where the outside world quiets down—and peace takes center stage.


Exploring Mid-Century Modern Design Through Home Maintenance & Renovations

Exploring Mid-Century Modern Design Through Home Maintenance & Renovations

Mid-century modern design is not just a trend—it’s a movement that continues to influence the way we live, renovate, and maintain our homes. Rooted in the post-World War II era, this architectural and interior style celebrated simplicity, functionality, and harmony with nature. Today, homeowners increasingly seek to capture the elegance and timelessness of mid-century modern design during home maintenance and renovation projects.

Whether you’re restoring an original 1950s home or integrating mid-century elements into a newer structure, understanding the philosophy behind the design is crucial. Through thoughtful renovations and maintenance strategies, you can bring the clean lines, warm woods, and iconic aesthetics of this celebrated era into your everyday living space.

Understanding the Core of Mid-Century Modern Design

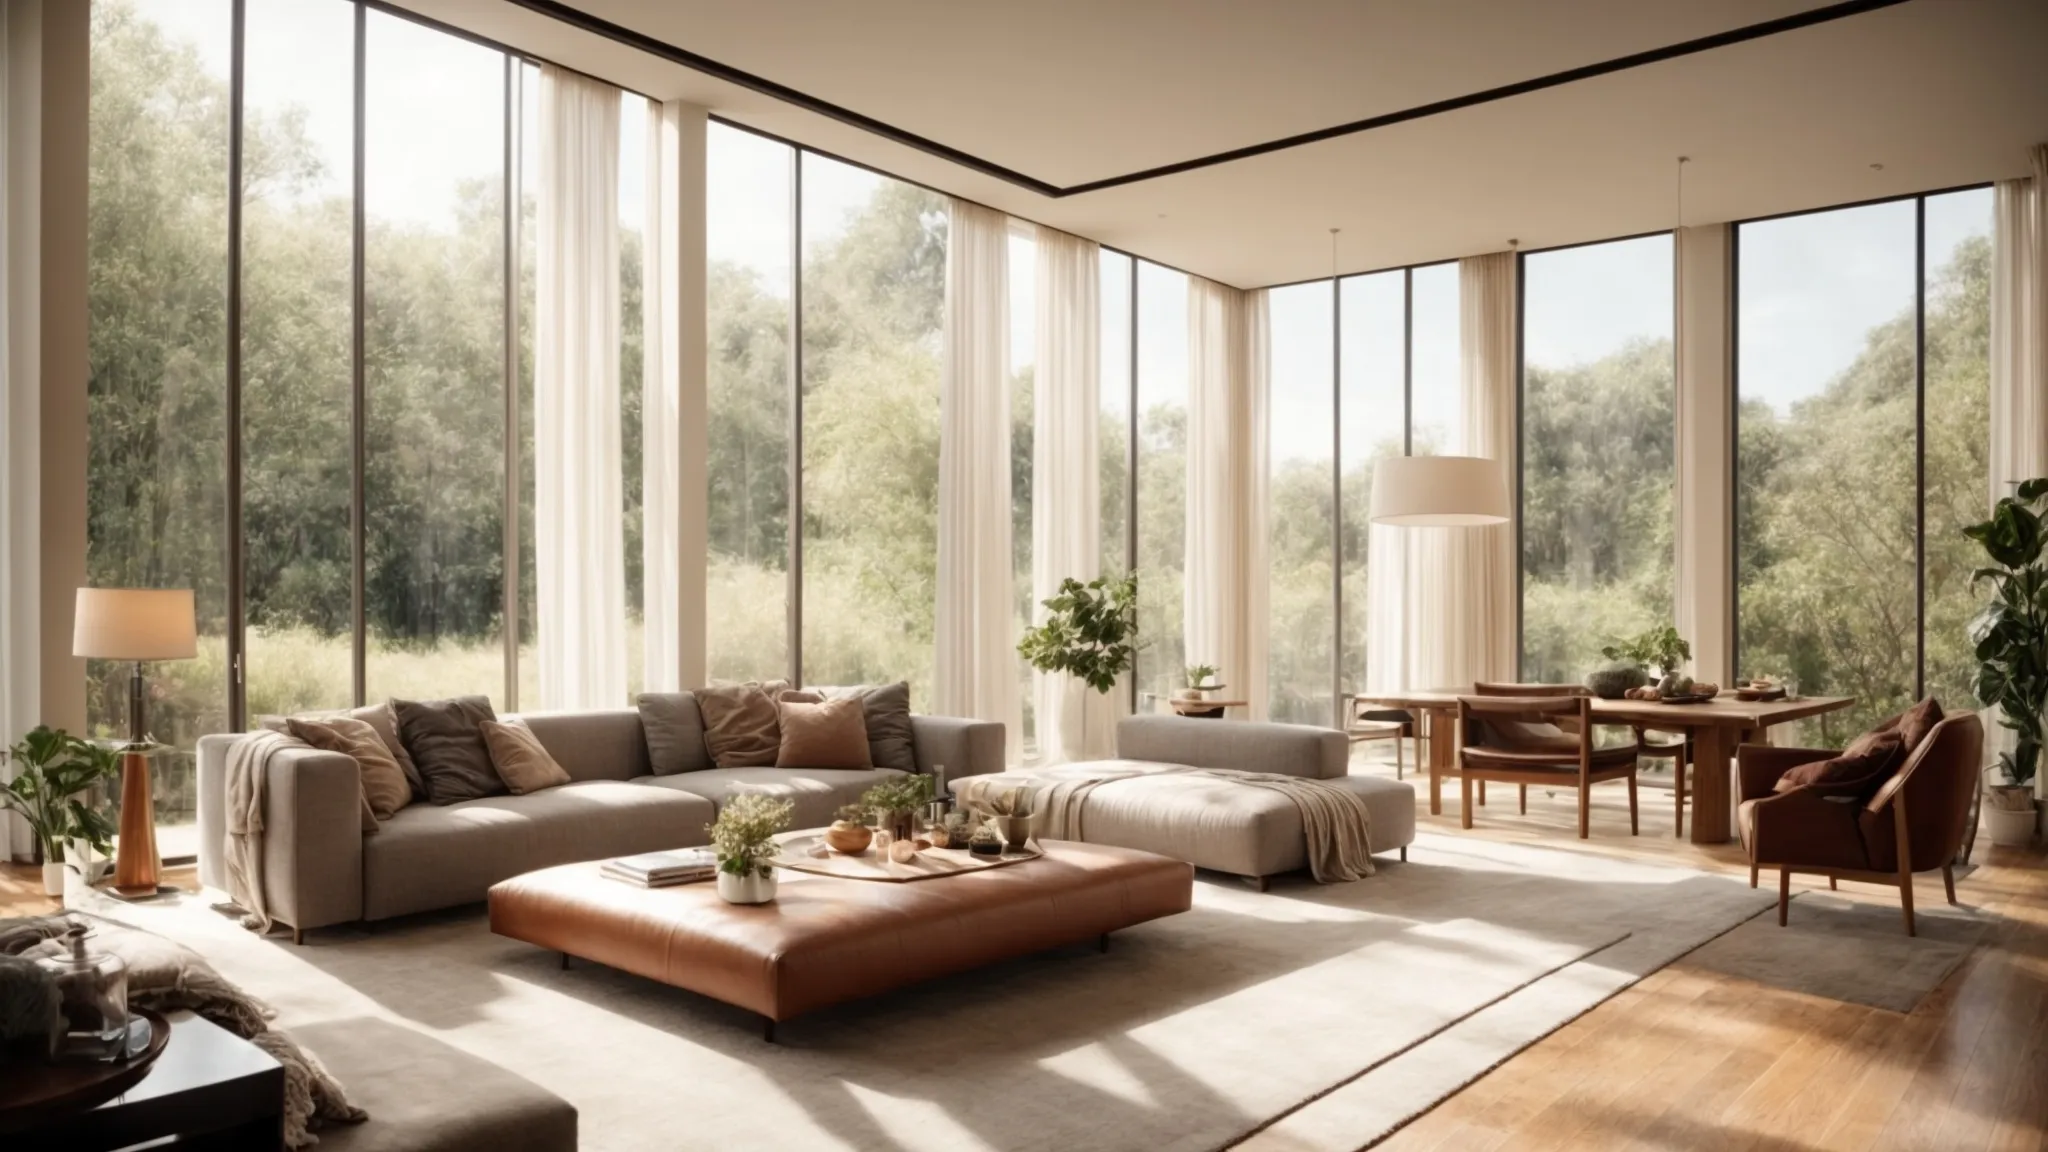
Before diving into renovations, it’s essential to understand what mid-century modern design actually encompasses. Emerging between the 1940s and 1970s, the style is characterized by open floor plans, minimalist structures, and the innovative use of materials. It fuses functionality with style and leans heavily into natural light, geometric shapes, and indoor-outdoor integration.

Maintenance and renovation projects focused on preserving or reintroducing mid-century elements should always honor this balance between aesthetic and utility. Every detail—from fixtures to flooring—should work in service of both form and function.

Revitalizing the Exterior with Purpose

The exterior of a mid-century modern home is typically modest and clean. Flat or low-pitched roofs, overhanging eaves, and asymmetrical designs are common. If you’re renovating the exterior, roof repairs should prioritize maintaining these iconic shapes. For example, replacing a roof might mean opting for a membrane or low-slope material that supports the original silhouette.

Faded siding or brickwork can be cleaned or refinished rather than replaced to preserve the authentic texture of the facade. When painting or restoring, stick to earthy or muted tones such as olive green, charcoal, or burnt orange to maintain historical accuracy.

Windows, often large and expansive in mid-century homes, are a key architectural feature. During maintenance, it’s critical to check seals, replace fogged glass, and ensure wood or aluminum frames are in good condition. The goal is to allow as much natural light as possible, in keeping with the original design principles.

Emphasizing Clean Lines in Interior Renovations

Inside the home, mid-century design is defined by an absence of clutter and an emphasis on clean lines. Open spaces with purposeful layouts allow for a free flow of movement. During renovations, removing unnecessary walls or bulky built-ins can open up the space and align with the mid-century aesthetic.

If you’re updating trim, baseboards, or moldings, simplicity is key. Forget ornate carvings or elaborate textures. Straight, smooth, and subtle are the defining traits of interior detailing for this style.

Furniture restoration and placement also play an important role. While not a structural renovation, maintaining or sourcing vintage furniture pieces with angled legs, wood frames, and minimalistic upholstery can tie the whole aesthetic together.

Choosing Materials That Reflect the Era

Materials are everything when you’re trying to recreate or preserve mid-century modern charm. Plywood, teak, walnut, and birch are signature woods that can be used in cabinetry, wall panels, and furniture. During kitchen or bathroom renovations, consider restoring or installing wood veneer cabinets and countertops with laminate finishes.

If your renovation involves flooring, hardwood or terrazzo are excellent choices. Regular maintenance like polishing or re-sealing helps retain their integrity while celebrating their retro appeal.

In terms of tiling, geometric or atomic-age patterns reflect the playful edge of mid-century modern without compromising its sophistication. Choosing finishes in matte or satin over high-gloss helps maintain authenticity.

Integrating Color Thoughtfully

Color in mid-century modern homes walks a fine line between neutral base palettes and vibrant accents. Maintenance projects like repainting walls or cabinetry should consider this balance. A common base might include white, gray, or beige, with pops of mustard yellow, turquoise, avocado green, or tangerine on accent walls or furnishings.

If you’re refreshing existing painted surfaces, choose shades that reflect the era’s confidence without overwhelming the space. Keep in mind that color was used to define areas, not dominate them.

In kitchens and bathrooms, colorful tiles and accessories can be a bold yet tasteful nod to mid-century flair. When replacing fixtures or hardware, brushed gold, matte black, or even copper can enhance both function and visual appeal.

Maintaining and Highlighting Architectural Details

Architectural features are the backbone of mid-century design. During maintenance, it’s important to preserve built-in shelving, wall cutouts, and other subtle structural elements. These features were designed not just to look good but to serve practical needs—making storage or display seamless and elegant.

Renovation projects that modernize these elements should do so without losing the intention behind them. For example, if a home has a classic room divider or open shelving unit between the dining and living areas, restoring it with original wood tones or replacing worn brackets with period-appropriate alternatives adds charm and cohesion.

Fireplaces, often made of brick or stone in mid-century homes, should be inspected regularly for structural safety. A deep cleaning, grout repair, or even limewashing can help preserve the raw material look without compromising on safety or style.

Upgrading Lighting the Mid-Century Way

Lighting in mid-century homes is both functional and sculptural. Updating or maintaining lighting fixtures can dramatically shift the mood and visual balance of a room. Iconic pieces like Sputnik chandeliers, globe pendants, and arc floor lamps embody the futuristic optimism of the era.

During electrical upgrades or rewiring projects, try to incorporate lighting that complements the clean lines and understated elegance of the home. Replacing heavy, ornate fixtures with sleek, atomic-inspired pieces can bring an entire room back to its mid-century roots.

Recessed lighting and track systems can also work well, especially when aimed to highlight architectural features or artwork. Always consider the light temperature—warm, soft light enhances the natural tones commonly used in mid-century interiors.

Enhancing Indoor-Outdoor Flow

One of the defining characteristics of mid-century modern homes is the effortless blending of indoor and outdoor spaces. Renovations that emphasize this connection are essential to maintaining the integrity of the design.

Sliding glass doors, floor-to-ceiling windows, and open patios are all elements that facilitate this seamless transition. When replacing doors or windows, opt for wide glass panels with slim frames to preserve views and light. Maintenance of these features includes ensuring tracks are clean and operational, and that seals are airtight to support energy efficiency.

Deck repairs, garden landscaping, and even the addition of pergolas can support the indoor-outdoor philosophy. When renovating exterior spaces, use natural materials like wood, stone, or concrete to maintain visual consistency with the home’s interior.

Sustainable Updates with Mid-Century Sensibility

Modern renovations increasingly focus on sustainability. The beauty of mid-century modern design is its inherent efficiency. Its open layouts and expansive windows were designed to maximize airflow and natural light, reducing energy consumption.

When upgrading HVAC systems or insulation, do so with respect for the existing structure. Use eco-friendly materials where possible and install systems that blend into the background. Solar panels can be added in ways that don’t distract from the low-profile roofline, and energy-efficient windows can be customized to retain original proportions.

Likewise, repurposing or restoring vintage pieces rather than buying new ones supports sustainable living while remaining true to the design ethos.

The Lasting Appeal of Mid-Century Modern Through Renovation

What makes mid-century modern design so timeless is its ability to evolve while staying rooted in core principles—simplicity, efficiency, and elegance. By focusing your home maintenance and renovation efforts around these ideals, you don’t just preserve a style; you enhance it.

A well-renovated mid-century home doesn’t look like a time capsule. It looks like a thoughtful blend of past and present, where every line, texture, and fixture serves a purpose. Through conscious decisions in maintenance and design, you can breathe new life into a space that’s both nostalgic and forward-thinking.

In embracing the essence of mid-century modern through your renovations, you not only elevate your home’s aesthetic—you honor a design movement that changed how we think about living, building, and being at home.

Home Maintenance & Renovations That Prepare Your Property for Renting

Home Maintenance & Renovations That Prepare Your Property for Renting

Renting out a property can be a rewarding way to generate passive income, but success in the rental market often hinges on how well the property is prepared. Home maintenance and strategic renovations not only enhance your property’s appeal but also help minimize future problems, attract reliable tenants, and justify higher rental rates. Whether you’re converting your own home into a rental or sprucing up an investment property, taking the right steps can make a significant difference in your returns and long-term satisfaction as a landlord.

Start with Structural and Safety Essentials

Before considering aesthetic upgrades, address all critical structural and safety issues. A rental property must be in good working order and meet legal safety standards to pass inspection and protect both your investment and your tenants.

Inspect the foundation for cracks or settling issues. A damaged foundation can lead to serious issues like uneven flooring or wall cracks. Roofing should be solid, leak-free, and ideally no more than 15–20 years old. Water intrusion is a major concern for tenants and a frequent source of emergency repair calls. Check the gutters, downspouts, and drainage to ensure water is directed away from the house.

Safety elements include functioning smoke and carbon monoxide detectors, secure hand railings, GFCI outlets near water sources, and up-to-code electrical systems. Doors and windows should have working locks and be easy to open in case of emergency. Ensuring your property meets or exceeds local building codes and safety regulations is not only essential for tenant wellbeing but also protects you legally as a landlord.

Upgrade Plumbing and Electrical Systems

Outdated plumbing and electrical systems are red flags for potential renters. Leaky pipes, inconsistent water pressure, and corroded lines can cause major issues. If your property has galvanized steel pipes, consider replacing them with modern PEX or copper options.

On the electrical side, a home built decades ago may not support today’s technology needs. Ensure the breaker box has sufficient amperage (typically 100–200 amps) and that outlets are plentiful in every room. It may be worthwhile to add USB charging ports or additional sockets in common areas to support modern living. Efficient systems also reduce the risk of costly maintenance down the line and keep tenants satisfied.

Improve Curb Appeal

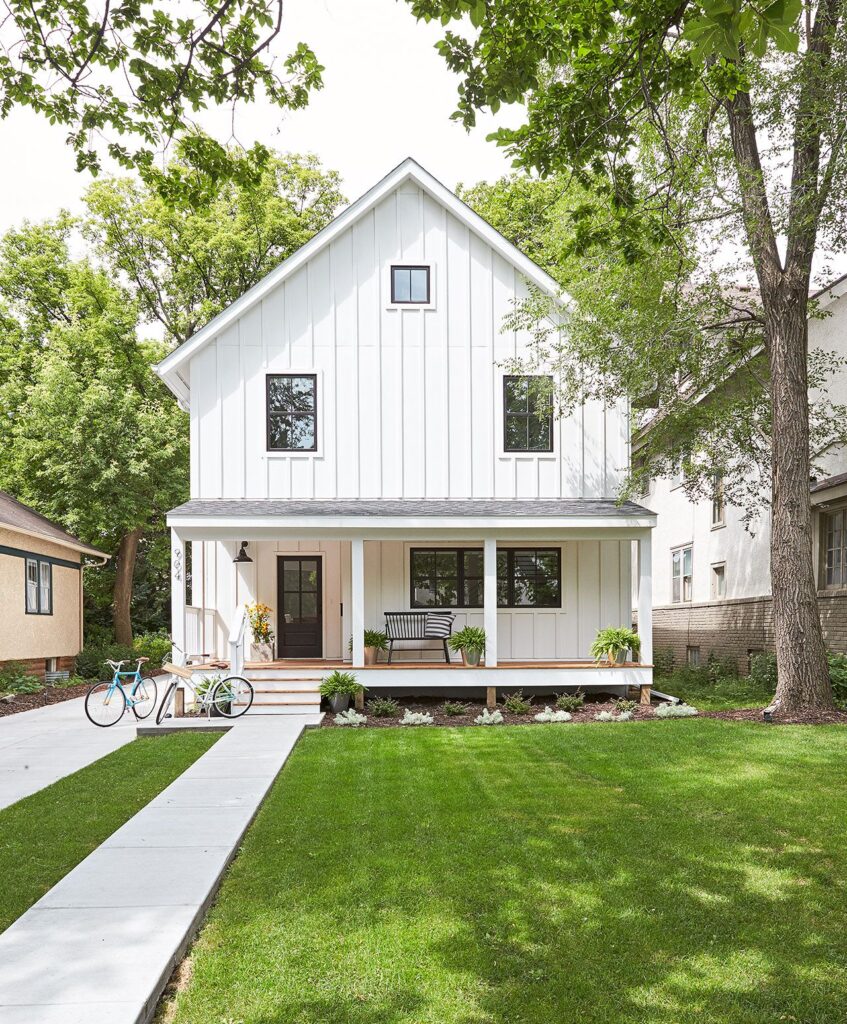
First impressions matter—and your property’s exterior is the first thing potential tenants will notice. Landscaping doesn’t have to be elaborate, but it should be neat, low-maintenance, and inviting. Mow the lawn, trim overgrown bushes, and plant drought-resistant shrubs or flowers to add visual interest. A fresh coat of paint on the exterior or front door can do wonders in refreshing the look of the home.

Power washing the driveway, walkway, and siding helps give your property a clean, well-maintained appearance. If the property has a fence, ensure it’s in good repair. Broken pickets, rusted chain links, or leaning posts can turn off otherwise interested renters.

Modernize the Kitchen and Bathrooms

Two of the most impactful areas in any rental home are the kitchen and bathrooms. Renters often base their decisions heavily on the quality and cleanliness of these rooms. You don’t have to embark on a full renovation, but even modest improvements can make a big difference.

In the kitchen, replace outdated cabinet hardware, update lighting fixtures, and install a new faucet. If the countertops are damaged or old laminate, consider replacing them with more durable surfaces like quartz or butcher block. Appliances should be functional, energy-efficient, and consistent in finish. Stainless steel continues to be a popular choice for its modern appeal and durability.

Bathrooms should be spotless and fresh. Re-grouting tiles, updating vanities, and replacing faucets or showerheads with modern fixtures can elevate the space. Installing water-saving toilets and fixtures will also reduce your utility expenses if you’re including water in the rent. These updates not only boost rental value but also signal to potential tenants that the property is well cared for.

Focus on Flooring That Lasts

Flooring is a key element in rental preparation because it impacts aesthetics, maintenance, and durability. Carpet may be soft underfoot, but it stains easily, traps odors, and wears down quickly—especially in high-traffic rental units.

Opt for hard-surface flooring like luxury vinyl plank (LVP), tile, or engineered hardwood. These materials are water-resistant, easy to clean, and long-lasting. LVP, in particular, offers the look of real wood at a fraction of the cost and is ideal for rental properties where turnover and wear are common.

Replacing carpet in bedrooms can still be acceptable depending on the market, but aim for a consistent, neutral color palette throughout to create a cohesive and appealing design.

Brighten the Space with Paint and Lighting

A fresh coat of paint is one of the most cost-effective ways to make your rental feel brand new. Choose neutral tones like warm grays, beige, or off-whites that make spaces feel bright, open, and adaptable to any décor style. Avoid bold or trendy colors that may not appeal to a wide range of tenants.

Updating lighting fixtures can also transform the feel of a home. Swap out outdated fixtures for sleek, modern designs. Use LED bulbs to improve energy efficiency and reduce maintenance. Add under-cabinet lighting in the kitchen or task lighting in work areas to improve functionality and ambiance.

A well-lit home feels larger, cleaner, and more welcoming—important traits for prospective tenants evaluating your property.

Ensure Storage and Functionality

Renters value storage—often more than homeowners. Take a look at your closets, pantries, and cabinet spaces to see if improvements are needed. Installing closet organizers, additional shelving, or even built-in storage benches can greatly enhance the practicality of your rental.

Consider functionality in other areas too. Is there a dedicated laundry space with proper ventilation? Do bedrooms have adequate closet space? Is there room for a desk or work area? These small but thoughtful considerations can improve the livability of your property and help it stand out in a competitive market.

Address Energy Efficiency and Utilities

In today’s rental market, energy efficiency is more than a nice-to-have; it’s often expected. Proper insulation, double-pane windows, and efficient HVAC systems not only reduce energy costs but also provide year-round comfort.

If your heating or cooling systems are outdated, replacing them can lower utility bills and attract tenants looking for modern amenities. Programmable thermostats and ceiling fans are also simple additions that enhance comfort and control. Sealing air leaks around doors and windows improves efficiency and eliminates drafts.

Appliances such as washers, dryers, dishwashers, and refrigerators should be Energy Star-rated where possible. These upgrades can even allow you to market the property as “eco-friendly,” which is a growing priority for many renters.

Don’t Overlook Permits and Documentation

All upgrades and renovations should be done in accordance with local building codes. For larger projects—like structural changes, plumbing alterations, or electrical upgrades—obtain the proper permits and keep documentation for future reference. Failing to do so can result in fines or delays if inspections are required.

This also becomes crucial when it’s time to insure the property. Insurance providers may ask for proof of work for major upgrades. Additionally, if you decide to sell the property down the line, having a record of maintenance and renovations boosts buyer confidence.

Final Clean and Pre-Rental Touches

Once all repairs and renovations are complete, conduct a deep clean. Hire professional cleaners if necessary to get into all the corners—especially in kitchens and bathrooms. Steam-clean carpets, polish floors, clean windows, and wipe down all surfaces.

Walk through the property with a tenant’s perspective. Is it move-in ready? Are there loose doorknobs, scuffed walls, or burnt-out bulbs? These final touches matter and can make or break a potential lease.

Document the property’s condition with photos and checklists before tenants move in. This protects you in case of disputes and ensures transparency.

A Smart Investment in Long-Term Success

Home maintenance and renovations that prepare your property for renting are essential investments—not expenses. While upfront costs can seem daunting, the payoff comes in the form of fewer vacancies, better tenants, and reduced emergency repairs. A well-prepared rental property is easier to manage, more marketable, and ultimately more profitable.

By focusing on both functionality and aesthetics, while adhering to safety and legal standards, you’ll ensure your rental is not only competitive but also a place where tenants want to stay long term. That’s the key to success in the rental property business.

Creating Visual Balance in Home Maintenance & Renovations

Creating Visual Balance in Home Maintenance & Renovations

When it comes to renovating a home or keeping up with regular maintenance, many people focus on function, structure, or cost. But there’s another essential factor that often gets overlooked: visual balance. This principle is a cornerstone of good design, and integrating it into home maintenance and renovation projects can transform a space from chaotic to cohesive, or from merely practical to genuinely beautiful. Visual balance is the art of distributing visual elements evenly across a space to create harmony, comfort, and flow—and it can elevate every room in your home.

Understanding Visual Balance in Home Design

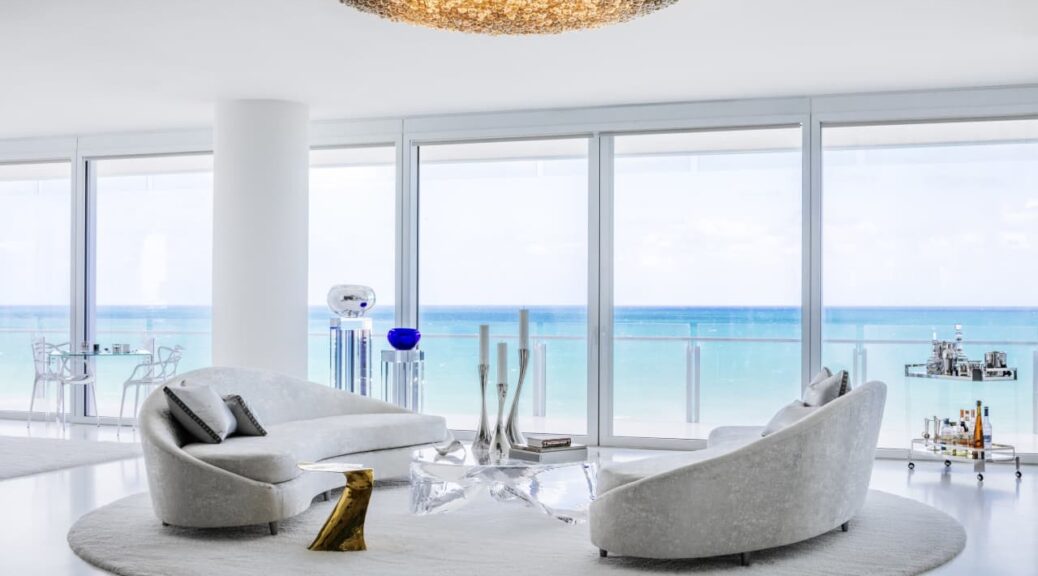
Visual balance doesn’t just mean symmetry. While symmetry can be one form of balance, especially in more traditional design aesthetics, it’s just one of several ways to achieve visual harmony. Balance can be symmetrical, asymmetrical, or radial. Symmetrical balance occurs when elements are mirrored on either side of a central axis. Asymmetrical balance happens when different elements with equal visual weight are distributed unevenly but still maintain harmony. Radial balance radiates from a central point, such as a chandelier in a round foyer.

Each form of balance can be used to create a specific mood or enhance a function. For example, symmetrical design can feel orderly and formal, while asymmetrical designs feel more relaxed and modern. Understanding what kind of balance suits your space and lifestyle can help you plan home maintenance and renovation strategies that feel both visually appealing and comfortable to live in.

Evaluating Existing Imbalances Before Renovating

Before you start tearing down walls or installing new cabinetry, it’s essential to evaluate the current visual balance of your space. Walk through your home slowly and observe how your eye moves. Do certain areas feel “heavier” than others? Are there overly cluttered sections or expanses that feel too bare? Look at the height of furniture, the distribution of colors, the way light fills the room, and how decor is arranged. Often, visual imbalance stems from mismatched proportions, uncoordinated color schemes, or lopsided layouts.

Making simple changes such as decluttering one area, rearranging furniture to better distribute visual weight, or even adjusting lighting can restore a sense of equilibrium. Once you identify where things feel off, you can begin making more targeted renovation decisions that address these issues directly.

The Role of Color and Texture in Balance

Color plays a significant role in how a room feels. Darker hues tend to feel “heavier,” while lighter colors feel airy and expansive. If one wall or area of your home has a deep shade or a bold wallpaper, balance it out with lighter furnishings or more open space around it. On the other hand, if your room feels too cold or sterile, introduce warmer tones through accessories or a feature wall.

Texture is another critical factor. Smooth surfaces like glass or polished stone can feel sleek but may make a space seem cold if overused. Textured elements such as rugs, wood, or fabric help soften the environment and provide balance against hard or reflective materials. When planning a renovation, consider mixing materials thoughtfully—pair a glossy countertop with matte cabinetry or blend smooth tile with rustic wood accents.

Balancing Furniture and Layout in Open Spaces

One of the challenges in modern home renovations is creating visual balance in open floor plans. These spaces can feel expansive but sometimes lack boundaries, which can make them look disjointed or aimless. The solution lies in defining zones while maintaining cohesion.

Start by anchoring each area with large, grounding pieces. A sofa in the living room, a dining table in the eating area, and a kitchen island all serve as visual anchors. Once your zones are defined, work on distributing visual weight. For example, if your sectional is large and dark, add a light-colored rug or artwork on the opposite side of the room to keep the space balanced. Even the placement of plants, shelves, or pendant lighting can help guide the eye and create a sense of evenness.

Wall Treatments and Architectural Features

Walls aren’t just dividers; they’re canvases that influence how a room feels. Wall treatments—like paint, wallpaper, paneling, or tile—can shift visual balance dramatically. When applying an accent wall, be strategic. Choose a wall that naturally draws attention, like the one behind a bed or fireplace, and balance its presence with complementary décor on adjacent walls.

Architectural features such as windows, moldings, or exposed beams should also be considered. These elements have strong visual presence and can throw off balance if not countered appropriately. For instance, a room with high ceilings and tall windows may feel top-heavy. You can restore balance by adding heavier furniture or layered rugs to ground the space.

Using Lighting to Guide Visual Flow

Lighting isn’t just about functionality—it’s a powerful design tool that can support visual balance. A space that’s too brightly lit in one corner but dim elsewhere will feel lopsided. Layered lighting—ambient, task, and accent—helps ensure even illumination and can highlight areas that need more presence.

Pendant lights over an island, sconces flanking a fireplace, or a floor lamp next to a reading chair all create visual rhythm and distribute weight. Additionally, natural light should be factored in when planning window treatments. Heavy drapes on one side of a room need to be visually counterbalanced elsewhere, perhaps with built-in shelves, tall bookcases, or artwork.

Maintaining Visual Balance During Upkeep and Repairs

Home maintenance isn’t just about fixing what’s broken. It’s also about preserving the harmony of your home’s design. When replacing broken items—like light fixtures, tiles, or cabinet hardware—choose options that maintain the established balance. Don’t install a bulky fixture in a space designed for something sleek, or replace subtle trim with something overly ornate unless you plan to adjust the entire room’s aesthetic.

The same principle applies to repainting or refinishing surfaces. Replacing a single wall’s color can impact the whole room’s balance. If you’re doing patchwork repairs, consider how the updated areas will interact with the rest of the space. It’s worth the extra time to ensure new elements don’t disrupt the harmony you’ve already created.

Using Decor to Restore or Enhance Balance

Sometimes, visual balance can be thrown off after a renovation simply because new features haven’t been “styled in.” Art, mirrors, throw pillows, and plants are more than decorative—they help refine the balance of a room. A large canvas on one wall can balance a tall bookshelf on the opposite side. A group of small frames can offset a single oversized element.

Mirrors, in particular, are great tools. They reflect light and can double the impact of other design features. Strategically placing a mirror across from a window, or near a key focal point, spreads visual weight and helps tie a room together.

The Psychological Impact of Visual Balance

What’s often overlooked in conversations about design is how visual balance affects the way we feel. An unbalanced space can create unease—even if we don’t consciously notice why. Balanced rooms promote calmness, clarity, and comfort. This makes visual balance not just a design decision but a lifestyle enhancer.

If your home feels stressful or cluttered, it may not be your possessions or your habits—it could be the visual imbalance of your environment. Renovating with an eye toward harmony can restore not just beauty to a space, but peace to your daily life.

Bringing It All Together

Creating visual balance in home maintenance and renovations isn’t about following a rigid formula. It’s about understanding the dynamics of space, light, color, and proportion—and how they interact with your lifestyle. Every decision, from layout to light bulbs, has the potential to shift the visual weight of a room.

As you plan your next project, whether it’s a simple repaint or a full-scale renovation, think beyond function. Ask yourself how the space will feel. Let balance be your guide, and you’ll find that your home not only looks better but lives better too.

In the end, the most beautiful homes are the ones that feel right. And when everything is in balance, your space will reflect not just good design—but intentional living.

Integrating Charging Stations into Home Maintenance & Renovations

Integrating Charging Stations into Home Maintenance & Renovations

As our lives become increasingly digital, with smartphones, tablets, laptops, electric vehicles, and smart home systems forming the backbone of our daily routines, the need for convenient and reliable charging solutions has never been more critical. Integrating charging stations into home maintenance and renovations is no longer a luxury—it’s a necessity. Whether you’re remodeling your kitchen, upgrading your garage, or building an addition, strategically planning where and how charging stations will be placed can enhance convenience, improve organization, and future-proof your home.

Incorporating charging stations during renovation projects allows homeowners to seamlessly blend functionality with design, eliminating unsightly cords, maximizing space, and ensuring all devices are ready when needed. Here’s how to effectively integrate charging stations into your next home maintenance or renovation project.

Understanding the Modern Charging Needs

Gone are the days when a single wall outlet was enough to meet your home’s power demands. Today, most households have multiple members, each with multiple devices that need charging every day. Phones, tablets, smartwatches, wireless earbuds, and even kitchen appliances rely on regular power sources. This surge in device usage calls for more thoughtful integration of power access throughout the home.

Additionally, the rise in electric vehicles (EVs) has led to a demand for powerful, dedicated charging solutions within garages or carports. Integrating charging stations at various points in your home can streamline energy use, cut down clutter, and create a safer and more organized environment.

Planning Charging Station Placement

The first step in integrating charging stations into your renovation is planning where they are most needed. Consider the natural habits of your household and where devices tend to accumulate. These areas are typically:

Entryways or Mudrooms – A convenient drop zone for phones and tablets when entering the home.

Kitchen or Dining Area – Often the central hub of the home, and an ideal place for powering devices while cooking or eating.

Home Office – A must-have for laptops, phones, and accessories.

Bedrooms – Nightstands can double as elegant charging areas.

Living Room or Family Room – A discreet charging drawer or wall-mounted solution can support guests and daily use.

Garage – The best location for EV charging or tool battery maintenance.

By identifying high-traffic and high-use areas, you can tailor the placement of charging stations to serve actual needs instead of just theoretical convenience.

Choosing the Right Type of Charging Station

Not all charging stations are created equal. When planning your renovation, it’s important to match the type of charging station to the area and its intended use.

For general household electronics, you might consider:

Built-in USB Outlets – These allow you to charge devices without needing the adapter block and can be installed directly into walls or furniture.

Pop-up Charging Stations – Perfect for kitchens and offices, they stay hidden until needed and reduce visual clutter.

Wireless Charging Pads – Ideal for nightstands or counters, offering sleek and cable-free functionality.

For garages or outdoor spaces, consider:

EV Charging Stations (Level 1 or Level 2) – Level 2 chargers offer faster charging times and are best suited for homeowners with EVs or those planning to purchase one in the future.

Weatherproof Charging Units – Great for outdoor living areas, they ensure durability and safety.

By selecting the right solution for each zone, you create a home that not only supports your devices but does so in an efficient and visually pleasing way.

Integrating Charging into Custom Furniture and Built-ins

One of the most aesthetically pleasing ways to integrate charging is to make it invisible. Custom carpentry and cabinetry offer the perfect opportunity to embed charging stations where they’re both convenient and discreet.

Think of a kitchen island drawer that conceals charging pads, or a built-in desk with a grommeted charging port leading to hidden power strips. Nightstands with wireless pads or pull-out trays with USB connections allow for functionality without the mess of wires and cords.

When renovating, you can work with designers and electricians to prewire and build these custom solutions, ensuring clean lines, clutter-free surfaces, and a sleek finish. This level of integration is impossible as a retrofit, making the renovation phase the perfect time for implementation.

Addressing Power Load and Safety

As you add more charging capabilities throughout your home, it’s vital to ensure your electrical system can handle the increased load. This is especially true if you’re installing a Level 2 EV charger or multiple fast-charging hubs.

During the renovation process, consult a licensed electrician to assess your panel’s capacity and determine whether an upgrade is necessary. Older homes, in particular, may need new circuits or panel replacements to safely support modern power needs. It’s also a good time to install surge protection and ensure that all outlets meet modern safety codes, especially in kitchens and bathrooms.

Renovations offer the chance to improve not just the look and feel of your home, but its underlying infrastructure. Don’t miss the opportunity to enhance your power grid while adding charging stations.

Future-Proofing Your Home

With smart home systems becoming increasingly common, it’s wise to think beyond today’s needs and prepare for future developments in technology. Renovating your home with charging in mind allows you to stay one step ahead of the curve.

Consider running conduit piping in walls that allow for future cabling or power upgrades. Opt for modular charging hubs that can be swapped out as new devices emerge. Choose outlet designs that support both USB-A and USB-C, ensuring compatibility with current and upcoming tech.

Even if you’re not driving an EV yet, installing conduit and wiring in your garage for a charger today could save you time and money in the future. Likewise, allocating space in your smart home panel for new charging modules can simplify future expansions.

Future-proofing during renovations doesn’t just make your home more functional—it increases its long-term resale value and appeal to tech-savvy buyers.

Enhancing Aesthetic Appeal While Charging

One common concern with charging stations is that they can disrupt the clean look of a home. Fortunately, modern solutions allow for high functionality without compromising design.

Charging drawers, under-counter pop-ups, and flush-mount wall panels keep devices powered without creating eyesores. For living areas, furniture with built-in ports and cable management systems lets you maintain a polished and welcoming environment.

Coordinate the style of charging units with the overall design theme—whether modern, traditional, or transitional—so that they blend in rather than stand out. Using finishes that match cabinetry or choosing hidden solutions helps integrate them naturally into the home’s flow.

Cost Considerations

While the cost of installing basic USB outlets is relatively minor, integrating advanced systems—especially EV chargers or smart hubs—can add a few hundred to several thousand dollars to your renovation budget. However, the long-term convenience and added home value often outweigh the upfront investment.

Remember, adding charging stations while other renovation work is underway is significantly more cost-effective than returning to open walls or rewire areas later. Planning ahead saves both time and money.

Factor charging into your project scope early to avoid budget surprises and ensure that your renovation delivers not only visual upgrades but real-world daily benefits.

Integrating charging stations into home maintenance and renovations is one of the smartest ways to bring your home up to speed with modern lifestyles. It’s not just about keeping phones and tablets powered—it’s about designing a living space that supports your routines, adapts to your habits, and prepares you for the future.

By thoughtfully planning placement, choosing the right technology, and integrating with your home’s style, you can create a space that functions beautifully without being cluttered or chaotic. Whether you’re charging your phone, your laptop, or your car, the convenience and efficiency of a well-integrated charging system will be felt every single day.

So as you embark on your next home maintenance or renovation project, don’t forget the power behind the power—your charging stations.

The Influence of Industrial Style on Home Maintenance & Renovations

The Influence of Industrial Style on Home Maintenance & Renovations

Industrial style has long transcended its origins in converted warehouses and urban lofts. Once defined by exposed pipes, concrete floors, and unrefined materials, it has now become a mainstream design trend that homeowners across the world are embracing. But industrial style isn’t just about aesthetics—it plays a significant role in how people approach home maintenance and renovations. The fusion of form and function at the heart of industrial design has shifted how homeowners think about materials, durability, repairs, and upgrades. Let’s explore the influence of industrial style on modern home maintenance and renovation projects, and how it’s helping redefine contemporary living spaces.

The Rise of Industrial Aesthetic in Residential Homes

Industrial design was originally born from necessity. Early 20th-century factories and warehouses weren’t built for beauty—they were made to be functional, practical, and efficient. But over the last few decades, interior designers began to see charm in the raw, unrefined look of these utilitarian spaces. Concrete, steel, brick, and wood came together in new ways, and the style evolved into an intentional aesthetic rather than a product of environment.

As more homeowners lean into industrial style, its visual elements—think metal beams, exposed ductwork, and rustic hardwood—have made their way into renovations. With this aesthetic comes a renewed focus on authenticity and materiality, influencing not only how a space looks, but how it is maintained and updated over time.

Material Choices That Prioritize Longevity

A core tenet of industrial design is the use of durable, low-maintenance materials. Steel, polished concrete, reclaimed wood, and exposed brick are favored not only for their visual impact but also for their ability to withstand time, weather, and wear.

When homeowners choose an industrial look during renovation, they’re often also choosing materials that demand less frequent repair or replacement. For instance, polished concrete floors are stain-resistant, tough under heavy use, and easy to clean—ideal for families or homeowners who prefer function over fuss. Similarly, metal staircases, shelving units, and light fixtures don’t require as much upkeep as painted or treated wooden alternatives. This durability minimizes ongoing maintenance and reduces long-term costs, making industrial style a practical decision as well as an aesthetic one.

Embracing Open Spaces and Structural Features

Industrial homes often have open-concept floor plans that mimic warehouse layouts. In renovations, this often means knocking down walls, removing false ceilings, and opening up kitchens and living areas. But this shift to openness has implications beyond aesthetics.

Exposing ductwork, ceiling joists, or piping can actually make future maintenance tasks easier. There’s less drywall or insulation to remove if something needs to be repaired. It also allows homeowners to monitor potential issues—like leaks or corrosion—more quickly, addressing them before they become bigger problems. What was once hidden is now part of the design, making home maintenance more transparent, both literally and figuratively.

Additionally, the move to open spaces has changed how HVAC, lighting, and wiring are handled. Open ceilings require strategic planning of electrical conduits and fixtures, and in turn, easier access to them down the line. These considerations are built into renovation plans from the start, giving maintenance teams and homeowners more flexibility in future work.

Mixing Old and New for Sustainable Renovations

Industrial style encourages the blending of vintage and modern elements. Reclaimed materials, antique furnishings, and salvaged fixtures are often paired with sleek, new technology. This mix not only creates visual interest but also promotes sustainability in home renovations.

Reclaimed wood from old barns or factories can be repurposed as flooring or paneling. Vintage metal lockers can be converted into modern storage. Old factory lighting can be rewired and installed as statement pieces. Each of these practices reduces waste and contributes to the eco-conscious ethos that increasingly guides home improvement decisions.

From a maintenance perspective, these reused materials also bring resilience. A hundred-year-old brick wall isn’t likely to need replacement any time soon. And because many of these pieces were originally built for commercial or industrial use, they often outperform modern, mass-produced counterparts in terms of durability.

Functional Minimalism and Low-Maintenance Design

Another influence of industrial style is its focus on utility and minimalism. Spaces are often uncluttered, with furniture and design choices that serve multiple purposes. Rather than filling a room with decorative pieces, industrial interiors rely on well-crafted staples—like a sturdy metal-framed sofa or concrete-topped dining table—that are both beautiful and built to last.

This simplicity also makes home maintenance more efficient. Fewer decorative details mean fewer surfaces to dust, polish, or repaint. Clean lines and open spaces are easier to manage. Choosing quality over quantity also helps reduce the need for regular replacements or repairs.

Moreover, industrial design often relies on a monochromatic or neutral palette—shades of gray, black, white, or natural wood tones. These colors are forgiving, masking minor imperfections, stains, or scuffs that might otherwise prompt more frequent repainting or cleaning. It’s a style that embraces wear as character, rather than something to hide.

Plumbing, Electrical, and HVAC with Style and Access

Perhaps one of the most direct intersections between industrial design and home maintenance is in how major systems are treated. In traditional homes, plumbing and wiring are hidden behind walls and ceilings, making repairs more disruptive. But in industrial spaces, these systems are often left exposed as part of the design language.

Exposed copper piping, surface-mounted electrical conduit, and visible ventilation ducts not only add to the industrial aesthetic but also simplify upkeep. Plumbers and electricians can access these systems more easily, and homeowners can identify issues earlier. This open display of a home’s mechanical systems becomes both a visual statement and a maintenance-friendly choice.

During renovations, this approach allows for upgrades without having to tear into walls or remove finishes. Whether it’s installing new lighting or upgrading a thermostat, the process is usually more straightforward when these systems are accessible.

Industrial-Inspired Kitchens and Bathrooms

Kitchens and bathrooms are two of the most maintenance-intensive areas of a home, and the influence of industrial style has brought functional innovation to both spaces.

In kitchens, stainless steel countertops and backsplashes have become popular, not just for their sleek look but also for their hygienic and durable nature. Open shelving—often made from reclaimed wood and pipe brackets—allows easy access to dishes and reduces the number of cabinet doors that can break or warp.

In bathrooms, industrial design often features subway tile, dark metal fixtures, and simple concrete or stone vanities. These materials are easy to clean, resistant to mold and mildew, and stand up well to humidity and use. The raw edges and exposed details give the room a sophisticated, utilitarian feel while supporting easy maintenance and longevity.

Lighting and Fixtures with Industrial Flair

Lighting plays a crucial role in both design and function, and industrial style offers a wealth of low-maintenance options. Pendant lights with metal shades, wall-mounted lamps on swing arms, and Edison bulbs encased in wire cages are not just trendy—they’re built for everyday use.

These fixtures often use materials like iron, bronze, or brushed steel, which are less likely to show fingerprints or wear. Their rugged construction reduces the chances of accidental breakage, and the designs are typically simple enough for homeowners to replace bulbs or parts on their own.

During renovations, incorporating these types of lights can save money in the long run while enhancing the character of a space.

A Long-Term Investment in Form and Function

Industrial style encourages homeowners to think differently about their spaces—not just how they look, but how they work. By choosing materials and layouts that prioritize strength, utility, and timelessness, homeowners are making an investment in the future of their homes.

Whether it’s through durable flooring, easily accessible utilities, or smart combinations of vintage and new elements, industrial design promotes a philosophy that beauty and function can—and should—coexist. Maintenance becomes easier, renovations become more intentional, and homes become better equipped to handle the wear of everyday life.

The influence of industrial style on home maintenance and renovations goes far beyond exposed brick and steel. It brings a mindset focused on durability, transparency, and minimal upkeep. For homeowners looking to merge aesthetic appeal with practical design, industrial style offers a compelling blueprint. It’s raw, honest, and refreshingly low-maintenance—everything modern living increasingly demands. As the trend continues to evolve, it’s likely that its core principles will remain, inspiring homeowners to embrace both the grit and grace of industrial design in their renovation journeys.

Ways to Make Hallways More Functional with Home Maintenance & Renovations

Ways to Make Hallways More Functional with Home Maintenance & Renovations

Hallways are often overlooked in home design and renovations, dismissed as mere passageways that connect one room to another. However, with thoughtful maintenance and renovations, hallways can become highly functional and visually appealing parts of your home. Whether you live in a small apartment or a sprawling house, making the most of these transitional spaces can improve both aesthetics and practicality. This blog explores a variety of ways to transform hallways into spaces that serve a purpose beyond simply getting from point A to point B.

Rethinking the Role of the Hallway

Traditionally, hallways have served as connectors—neutral spaces between more important rooms. But modern home design philosophy encourages a more holistic approach where every square foot of a home has purpose. Hallways, in particular, hold untapped potential. By reimagining them as functional extensions of the rooms they connect, you can maximize your home’s efficiency, storage, and style.

Renovations don’t always have to be expensive or extensive to have a big impact. Even minor upgrades like lighting changes, wall treatments, or clever storage additions can turn a dull hallway into a highly practical and attractive space. Functionality and beauty are not mutually exclusive, and hallways are the perfect places to prove that point.

Lighting Enhancements for Safety and Style

One of the most important elements in any hallway renovation is lighting. A dim, poorly lit hallway can feel uninviting and even unsafe. Brightening this area not only improves visibility but also transforms the mood of your entire home. Consider replacing old fixtures with energy-efficient LED lighting that runs the length of the hallway or adds ambient light from ceiling-mounted or wall-mounted options.

Installing motion-sensor lights can also enhance functionality, especially for nighttime navigation. For a more decorative touch, wall sconces or pendant lights can add character while improving illumination. Layering lighting—using a mix of ambient, accent, and task lighting—creates a dynamic and functional hallway that’s both beautiful and safe.

Smart Storage Solutions

One of the best ways to make a hallway more functional is by integrating storage. Narrow hallways may seem restrictive, but there are several creative ways to incorporate storage without making the space feel cramped.

Custom-built shelving, recessed wall units, or shallow cabinetry can provide homes for books, shoes, bags, or decorative items. Hooks, cubbies, or narrow benches can turn the hallway into a convenient drop zone for daily essentials, especially near entryways. In homes where closet space is limited, hallways can become overflow storage for linens, seasonal gear, or cleaning supplies when outfitted with smart cabinetry.

In longer hallways, underutilized wall space offers the chance to add built-in closets or open shelving. These additions provide storage that’s not only accessible but can also be designed to blend seamlessly with the existing décor.

Making a Statement with Design

Hallways offer a unique opportunity to be bold with design, especially if the rest of your home is more subdued. Because of their confined footprint, hallways can handle patterns, colors, and textures that might overwhelm larger rooms. Consider accent walls, wallpaper, or mural art to add visual intrigue and personality.

Wainscoting or paneling can also provide a touch of sophistication while protecting walls from scuffs and scratches, especially in high-traffic areas. Incorporating mirrors can enhance natural light and make tight hallways appear larger and more open.

Flooring plays a key role in the functionality of a hallway too. Durable materials like hardwood, luxury vinyl, or tile not only stand up to foot traffic but can also help define the hallway as a distinct and thoughtful design element. Adding a runner rug can increase comfort underfoot and protect the floor, all while contributing to the overall look of the space.

Multi-Use Hallway Concepts

If you have a wide hallway or a long stretch of unused space, why not reimagine it as a usable room in itself? Hallways can double as mini home offices, reading nooks, art galleries, or display areas. A floating desk with a chair tucked beneath can transform one end of a hallway into a functional work-from-home setup. Add a power outlet and proper lighting, and suddenly that space is pulling double duty.

Similarly, built-in window seats, if your hallway includes a window, can offer cozy spots to read or relax. Adding bookshelves or decorative cabinets on either side completes the picture and enhances utility. Even narrow hallways can feature art installations or rotating family photo galleries, adding meaning and engagement to what would otherwise be a blank space.

Upgrading for Accessibility and Ease

Hallways play a significant role in home accessibility, especially for those with mobility concerns. Renovations can ensure these spaces are easy to navigate by widening door frames, smoothing out flooring transitions, or installing non-slip surfaces. If your hallway connects to key living spaces, adding features like handrails, smart lighting controls, or low-profile thresholds can vastly improve comfort and independence for aging residents or family members with disabilities.

In multilevel homes, hallways near staircases can benefit from clearly marked steps and consistent lighting. Consider adding tactile elements or contrasting materials on flooring and walls to aid navigation.

Soundproofing and Insulation Benefits

Hallways often function as buffers between noisy areas of the home, such as kitchens and living rooms, and quieter zones like bedrooms. Enhancing this barrier through better insulation or soundproofing can dramatically improve the comfort of your home.

Installing solid-core doors, acoustic panels, or heavier wall treatments like fabric coverings or art canvases can reduce noise transmission. Even thick rugs and padded runners can help absorb sound in busy households. This can be particularly useful in homes with children, musicians, or home offices, where peace and quiet are essential.

Integrating Technology

Today’s smart home technology can make hallways more functional than ever. Motion-activated lighting, security sensors, thermostats, or even intercom systems can be integrated along the hallway walls. Hallways can serve as central hubs for smart home command panels, making it easier to control various elements of the home from one place.

For families, a hallway-mounted touchscreen calendar, bulletin board, or digital assistant can help keep everyone organized and informed. These tech upgrades don’t just add convenience; they also add an element of modern sophistication to what was once just a pass-through space.

Seasonal and Decorative Versatility

Hallways are ideal areas for seasonal décor. Because they’re often the first space guests see upon entering the home, they set the tone. By dedicating wall space or built-in shelving to seasonal rotations—such as autumn leaves, winter lights, spring florals, or holiday themes—you can make your home feel lively and current without the need to constantly rearrange larger rooms.

During renovations, consider adding flexible display areas such as shadow boxes or magnetic walls where rotating artwork or decor can be featured. This keeps the hallway engaging year-round and allows you to refresh the space without major overhauls.

Making Small Changes That Matter

You don’t need to undergo a major renovation to make your hallway more functional. Even small updates—such as changing the paint color to something more reflective, installing better lighting, or adding a slim console table—can yield significant results. Every hallway is different, so the key is to tailor the changes to your household’s specific needs.

Start by observing how the hallway is currently used. Is it cluttered with shoes, coats, or mail? Does it feel dark or cramped? Does it lack personality? These clues can guide your renovation priorities. From there, invest in upgrades that resolve these issues while also enhancing the look of your home.

Embracing the Full Potential of Hallways

Hallways may not be the first space you think of when planning home renovations, but they’re integral to the flow and functionality of any home. When properly maintained and thoughtfully renovated, hallways can do much more than connect rooms—they can become destinations in themselves. Whether through better lighting, added storage, creative design, or smart technology, these transitional spaces can be transformed into practical, beautiful parts of daily life.

As you plan your next home maintenance or renovation project, don’t let the hallway be an afterthought. With a little intention and creativity, you’ll find that even the narrowest corridor can serve a big purpose.

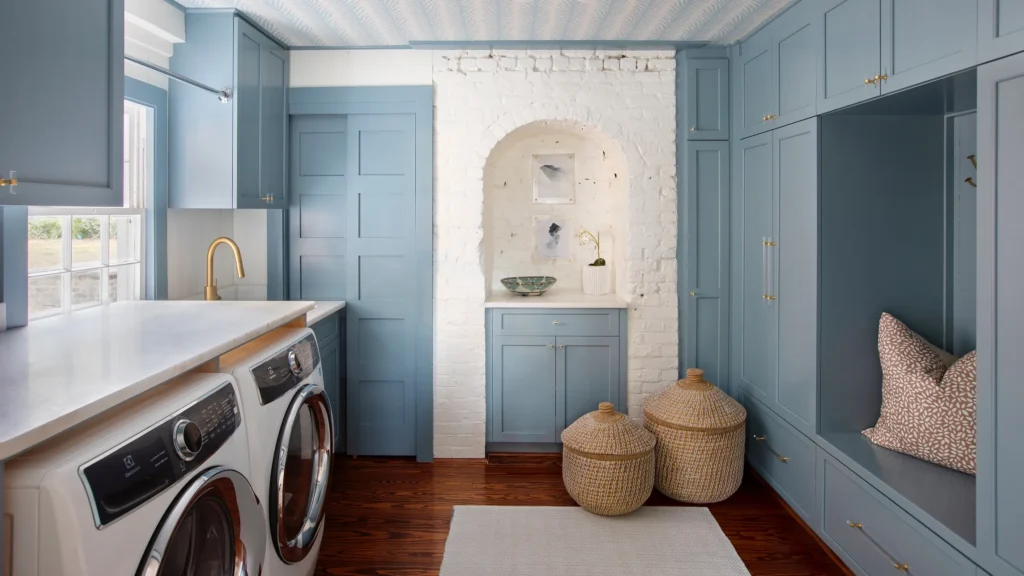
Revamping Your Laundry Room with Home Maintenance & Renovations

Revamping Your Laundry Room with Home Maintenance & Renovations

When we think of home renovations, the laundry room rarely sits at the top of the priority list. Yet, it’s one of the most frequently used spaces in any household. Whether you’re managing a bustling family household or living solo, the laundry room plays a crucial role in maintaining order. Revamping your laundry room with home maintenance and renovations not only enhances its functionality but also adds style, value, and convenience to your daily life.

A modernized laundry room can reduce stress, streamline your chores, and even improve your home’s resale appeal. Let’s explore how strategic updates, thoughtful layout changes, and smart renovations can breathe new life into your laundry space.

Understanding the Importance of a Functional Laundry Room

A well-planned laundry room can be more than just a place to wash clothes. It can serve as a utility space, mudroom, storage zone, or even a pet-washing station. Unfortunately, many homes treat it as an afterthought—cramped, dimly lit, or lacking practical features.

Revamping the laundry room means creating a space that works for your needs. This could involve upgrading appliances, reconfiguring storage, enhancing lighting, or improving ventilation. A thoughtfully maintained and renovated laundry room can boost productivity, save time, and make the entire household flow more efficiently.

Assessing the Current Layout and Condition

Before jumping into renovations, it’s important to take stock of your existing space. Are the appliances outdated or underperforming? Do you constantly feel short on storage? Is the lighting insufficient, or are you battling persistent moisture problems?

A detailed assessment can help you identify both cosmetic and functional issues. Pay close attention to plumbing, electrical connections, flooring condition, and signs of mold or water damage. Home maintenance in this phase might include checking for leaks, ensuring proper ventilation, and updating old outlets to GFCI for safety.

If your laundry area is tucked into a dark basement corner or squeezed into a hallway closet, now’s the time to rethink placement and usage. Expanding or relocating the space might require a larger renovation effort, but the benefits of a comfortable, accessible laundry area can far outweigh the hassle.

Upgrading Appliances: The Cornerstone of Laundry Renovations

At the heart of every laundry room are the washer and dryer. Modern appliances are more energy-efficient, quieter, and often come with features that make washing clothes quicker and easier.

Front-loading machines, for example, save water and offer stackable options, which is perfect for maximizing space in smaller rooms. Many newer models also come with smart features—like remote start and cycle tracking—that can save both time and energy.

Don’t forget to evaluate your utility connections during this process. Older homes may have outdated plumbing or electrical systems that aren’t compatible with newer machines. As part of your home maintenance plan, consider upgrading wiring, plumbing lines, or even venting to support your new appliances.

Creating Intelligent Storage Solutions

Laundry rooms are often plagued by clutter—detergent bottles, cleaning tools, hampers, and linens all fighting for space. One of the most valuable upgrades you can invest in is a custom storage system tailored to your household’s needs.

Cabinetry above or around appliances can hide unsightly supplies. Pull-out shelves, tall cabinets for brooms and vacuums, and open shelving for frequently used items create a more organized and visually pleasing environment.

If space is limited, think vertically. Wall-mounted drying racks, over-the-door organizers, and ceiling-mounted shelves can help store items without consuming floor space. Even small improvements in this area can lead to a more functional and less stressful daily routine.

Flooring and Wall Updates for Style and Durability

Laundry rooms experience plenty of wear and tear, from spills and splashes to heavy foot traffic. Choosing the right materials is critical not only for aesthetics but also for long-term durability.

Water-resistant flooring is a must. Tile, luxury vinyl planks, and sealed concrete are excellent choices, offering protection against moisture while being easy to clean. Area rugs or anti-fatigue mats near the appliances can add comfort underfoot while keeping things stylish.

As for the walls, consider moisture-resistant paint or tile backsplashes for a polished look that’s also easy to maintain. Adding a pop of color or wallpaper can inject personality into the room—transforming it from a utilitarian space into one you enjoy spending time in.

Improving Lighting and Ventilation

Lighting often goes overlooked in laundry rooms. Harsh fluorescent fixtures or dim basement bulbs don’t help when you’re trying to sort socks or spot stains. Natural light is ideal, so if possible, incorporate windows or skylights into your renovation plan.

In terms of artificial lighting, layered options work best. Overhead lighting combined with task lighting—such as under-cabinet LEDs or pendant lights above workspaces—creates a bright, inviting environment.

Proper ventilation is just as important, especially in spaces prone to moisture. An efficient exhaust fan helps prevent mold and mildew, extends the life of your appliances, and keeps the room smelling fresh. As part of your home maintenance routine, ensure dryer vents are cleaned regularly and airflow systems are unobstructed.

Adding Functional Extras That Make a Difference

Sometimes it’s the little additions that transform a space from basic to brilliant. Folding stations, built-in ironing boards, laundry sinks, or pet wash stations can make a big difference in how the space serves your lifestyle.

Folding stations can be as simple as a solid countertop over your machines or a custom-built surface along a wall. A utility sink makes soaking and hand-washing garments easier, while built-in hampers can help sort loads more efficiently.

Adding these functional touches not only upgrades your day-to-day laundry tasks but also gives the room a sense of purpose and care, enhancing your overall satisfaction with the space.

Soundproofing and Insulation

Washer and dryer noise can disrupt the peace in adjacent rooms, especially in open-concept homes or multi-story layouts. Insulating the laundry room during renovations helps dampen noise and improves energy efficiency.

Consider adding soundproofing insulation to walls, especially if the room is near bedrooms or living areas. Weatherstripping the door or installing solid-core doors can also help block noise. For homes with laundry appliances on upper floors, reinforcing flooring with vibration pads or noise-dampening underlayments can reduce the sound and motion that often transfer between levels.

Making the Space Multi-Purpose

Modern laundry rooms are evolving to meet more than one need. If you’re short on square footage, why not blend the laundry room with another space? Mudrooms, craft corners, or pet care zones are common companions to laundry areas.

By using smart design—like sliding doors, fold-away features, and flexible storage—you can create a multifunctional area that doesn’t feel cramped. Consider adding hooks for coats and bags, a bench for taking off shoes, or a small workstation for folding laundry and handling household tasks.

Blending purposes makes the space feel more intentional and dynamic. It’s not just about laundry anymore—it’s about elevating how your home functions.

Budgeting and Planning Ahead
As with any renovation, it’s important to budget realistically. The cost of revamping a laundry room can vary depending on the scope—ranging from minor updates under $1,000 to full-scale remodels exceeding $10,000.

Start with a clear vision of what you need most. Prioritize functional upgrades (like appliances and plumbing) before cosmetic ones. Look for ways to save, such as refacing existing cabinets or using cost-effective materials that mimic higher-end options.

Work with experienced contractors or designers if your renovation involves complex elements like moving plumbing or electrical systems. Their expertise ensures your upgrades meet code requirements and run efficiently for years to come.

Don’t Underestimate the Power of a Well-Designed Laundry Room

Revamping your laundry room with home maintenance and renovations is one of the most rewarding investments you can make. It’s a small space with a big impact—on your routine, your comfort, and your home’s value.

Whether you’re aiming for sleek and modern or cozy and practical, approaching the project with thoughtful planning ensures the result is both beautiful and functional. With upgraded appliances, smart storage, durable finishes, and a bit of creativity, your laundry room can evolve from a forgotten corner to a beloved part of your home.

The next time you toss in a load of clothes, you’ll feel the difference—efficiency, calm, and maybe even a little joy in the chore. That’s the power of a well-renovated space.

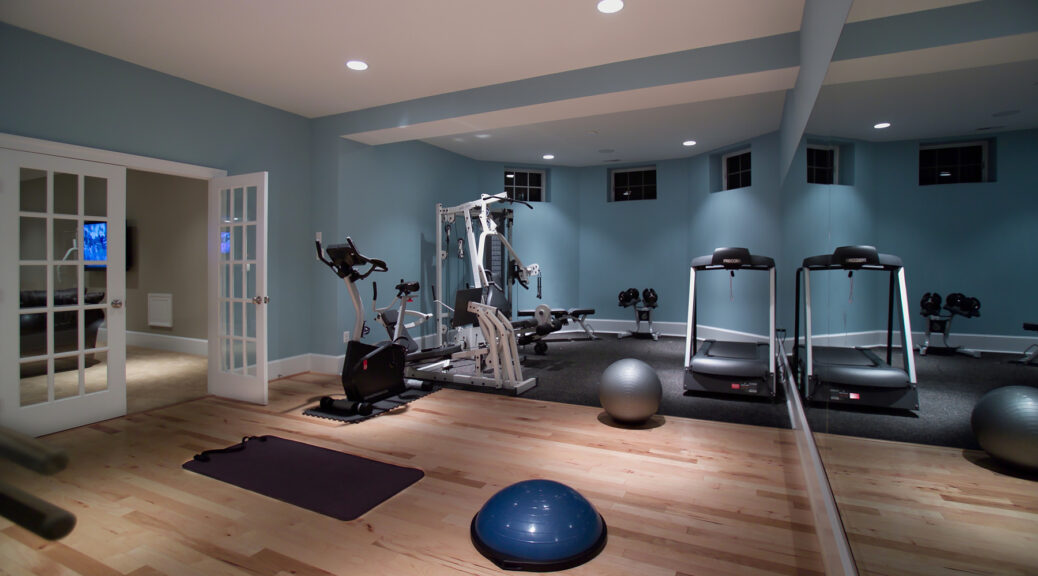
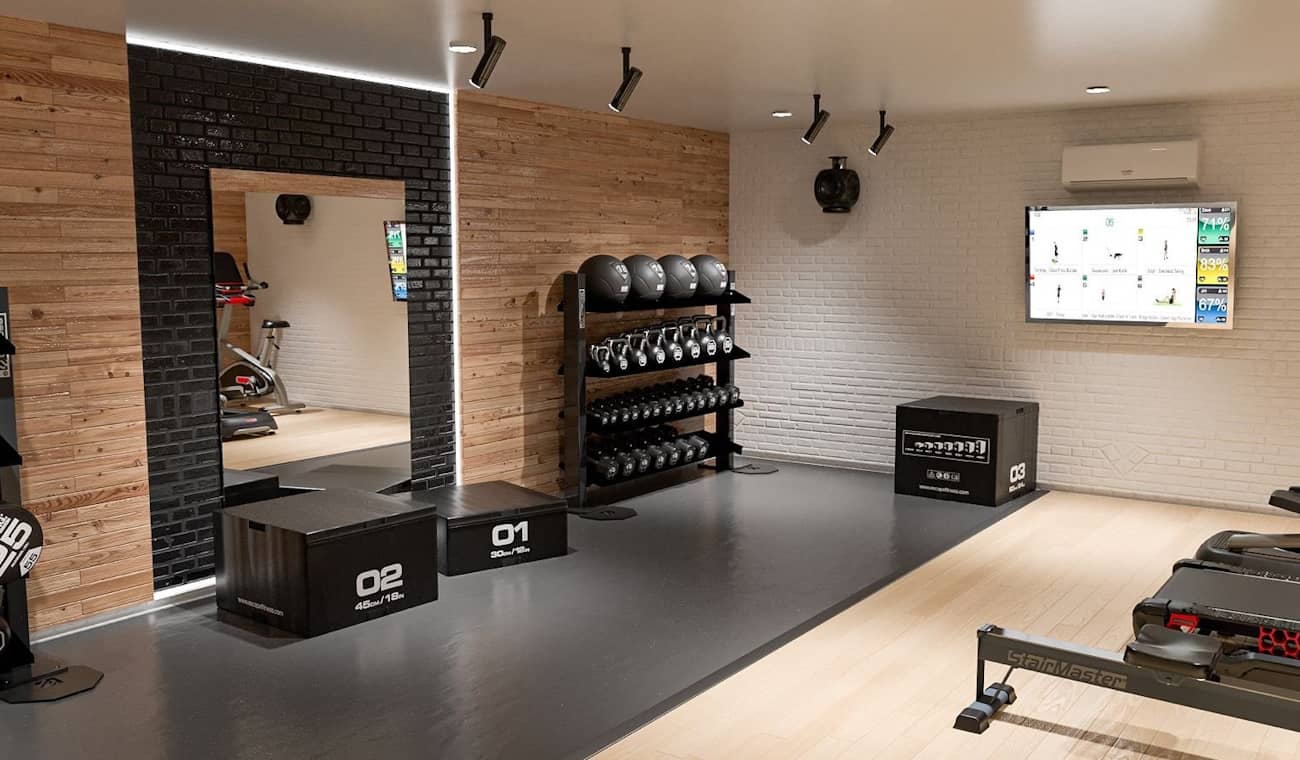
Building a Home Gym During Home Maintenance & Renovations

Building a Home Gym During Home Maintenance & Renovations

In today’s fast-paced world, finding time to prioritize fitness can be challenging. Between work schedules, family responsibilities, and daily commutes, getting to the gym often feels like another task on an already overloaded to-do list. That’s why more homeowners are choosing to bring the gym home. And what better time to do it than during home maintenance and renovations? With some thoughtful planning and a clear vision, building a home gym during this phase can be both practical and cost-effective.

Why Build a Home Gym During Renovations?

Timing matters in any project, and integrating a home gym into your renovation plan offers several advantages. First, it allows for efficient use of resources. If contractors are already modifying walls, upgrading electrical systems, or replacing floors, adding gym-specific features becomes less of a logistical hassle and more of a natural extension of the work already underway.

Secondly, tackling the gym space alongside broader home maintenance can help maintain consistency in design, materials, and flow. Whether you’re converting a basement, a spare bedroom, or carving out space in a garage, renovating with the end goal of a fitness zone ensures that everything—from lighting to flooring—supports the purpose of the space.

Most importantly, creating a dedicated fitness area in your home removes excuses. When the gym is just steps away, there’s no reason to skip your workout.

Choosing the Right Location

The first big decision is choosing where your home gym will go. This depends on the layout of your home and the type of workouts you plan to do. A basement is often ideal because it’s naturally separate from living areas and can handle heavy equipment without disturbing others. However, basements may require extra attention to ventilation and lighting.

A garage can be another great option, especially if it’s already underused or cluttered with storage. It often has a concrete floor—great for supporting weight equipment—and can be easily modified with rubber gym flooring and insulation. Spare bedrooms or even a corner of a larger living space can work well too, especially if your fitness routine is more yoga or pilates focused rather than heavy lifting.

Keep in mind soundproofing, airflow, and access to natural light when finalizing the location. You want the space to be motivating and functional, not isolated or uncomfortable.

Structuring the Renovation for Fitness Use

Once you’ve chosen the location, work with your contractor or renovation team to make structural decisions that align with the gym’s purpose. One major element is the floor. A gym floor needs to handle impact, resist wear, and support heavy equipment. Rubber flooring is an excellent choice—it’s durable, relatively affordable, and helps with shock absorption and noise.

Ceiling height is another consideration, especially if you’ll be doing overhead movements like pull-ups or lifting barbells. Make sure your chosen room provides enough clearance for safe movement.

You’ll also want to assess the electrical setup. Treadmills, ellipticals, and rowing machines all require power outlets, often with specific voltage needs. During the renovation, it’s easier to upgrade wiring or add outlets than to try to adapt later.

Lighting plays a huge role in making the space feel energizing and welcoming. Natural light is ideal, but if your gym is in a basement or garage, install high-quality LED lighting that mimics daylight. Consider adding mirrors as well. Not only do they help monitor form during workouts, but they also make smaller rooms feel larger and brighter.

Storage and Organization

A home gym can quickly become chaotic without proper organization. During the renovation, you can install built-in shelves, wall racks, or cabinets that keep equipment off the floor and easy to access. Wall-mounted storage solutions for dumbbells, resistance bands, yoga mats, or jump ropes save space and create a cleaner, safer workout environment.

If you’re short on square footage, multi-functional equipment can reduce clutter. Adjustable dumbbells, foldable benches, or resistance bands with various attachments can offer a full-body workout without filling the entire room.

Hooks and baskets can be mounted on walls to keep things tidy. If you’re integrating the gym into a shared space, consider cabinets or closets that can hide equipment when not in use, preserving the room’s versatility.


Incorporating Tech and Entertainment

Part of what makes commercial gyms engaging is the availability of media—TVs, music, virtual classes. You can bring the same benefits to your home gym with thoughtful planning during renovations.

Installing a wall-mounted television or a projector gives you access to streaming services, virtual trainers, or workout videos. A solid sound system or Bluetooth speaker setup can boost motivation during intense workouts. Make sure to run necessary wiring or install appropriate mounts during the renovation phase, not after.

Smart fitness mirrors, interactive workout platforms, or app-connected equipment like Peloton bikes or Tonal systems can also be integrated into your plan. If you’re using tech-heavy gear, ensure your Wi-Fi signal is strong or add a network extender to the room.

Design and Aesthetics

Don’t overlook aesthetics just because it’s a workout room. A well-designed space can improve your mood and increase your motivation to use it regularly. Choose a color palette that energizes you—light neutrals, greens, or even bold accents like reds and oranges.

Use inspiring wall art or quotes to personalize the space. Mirrors aren’t just functional—they also help make the room look polished and professional. Plants or natural materials can introduce a calming, biophilic element, which works especially well in yoga or stretching zones.

Adding a few personal touches—like a hydration station, towel rack, or mini-fridge for protein shakes—can take the space from functional to luxurious.

Safety First

With all the enthusiasm that comes with building a home gym, safety must remain a top priority. If you’re installing large or heavy equipment, make sure your flooring and support structures can handle the load. Anchoring equipment to the wall or floor may be necessary to prevent tipping.

Lighting should be even and bright to prevent tripping. Avoid clutter in walkways, and if you’re using any electrical equipment, protect cords and plug them in safely. Mats should be non-slip, especially for high-movement workouts.

It’s also a good idea to include a first-aid kit in or near the space and make sure your home insurance covers any liability associated with a private gym.

Long-Term Value of a Home Gym

Beyond the immediate convenience and health benefits, a well-built home gym can actually add long-term value to your property. Future buyers may appreciate the versatility of a finished space that supports wellness, especially if it’s done with care and high-quality materials.

Just like a renovated kitchen or bathroom, a smartly designed home gym can be a selling point. It reflects a modern lifestyle and appeals to a growing demographic prioritizing health and convenience.

Building a home gym during home maintenance and renovations is a smart, forward-thinking investment in both your health and your property. When executed properly, it offers daily convenience, long-term savings on gym memberships, and the motivation that comes from having a personalized workout space just a few steps away.

By incorporating it into your renovation plans, you gain the opportunity to create a gym tailored specifically to your goals, space, and lifestyle. From choosing the right flooring and lighting to adding tech features and storage solutions, every detail can be aligned with how you like to move, sweat, and thrive. Whether your focus is strength training, cardio, flexibility, or a combination of all three, your dream fitness space is well within reach.

How to Choose Between Open and Closed Kitchens in Home Maintenance & Renovations

How to Choose Between Open and Closed Kitchens in Home Maintenance & Renovations

Renovating a home is a chance to breathe new life into your space. Among the biggest decisions homeowners face during a kitchen renovation is whether to go for an open kitchen or stick with a closed one. This choice can define how the heart of your home looks, feels, and functions. The open versus closed kitchen debate is deeply rooted in lifestyle, spatial layout, personal preference, and even cultural nuances. Each layout has its pros and cons, and the decision often depends on how you want to live and entertain in your space.

This blog dives deep into the practical and emotional sides of choosing between open and closed kitchens during renovations, helping you arrive at the right design for your needs.

Understanding the Open Kitchen Concept

Open kitchens have become increasingly popular over the past couple of decades. They typically integrate the kitchen with the dining and living areas, creating a large, multifunctional space. There are minimal physical barriers, which promotes flow, interaction, and connectivity between spaces.

This design is ideal for those who love to host, cook while chatting with guests, or keep an eye on kids playing in the adjoining room. Open kitchens are synonymous with modern living—bright, airy, and informal.

However, the openness comes with challenges. Without walls or doors to contain smells, sounds, and visual clutter, open kitchens require more intentional planning. Your organization skills and appliance choices may become more critical in an open layout, where the kitchen is always on display.

The Allure of Closed Kitchens

Closed kitchens, on the other hand, are separate rooms, defined by walls or partitions. This traditional setup focuses more on function than social interaction. In a closed kitchen, cooking is a private activity, and the mess is kept out of sight.

Closed kitchens appeal to those who appreciate quiet, focused cooking time without distractions. They’re also preferred by those who frequently prepare complex meals or need a lot of counter space to work uninterrupted.

From a renovation perspective, closed kitchens may offer more flexibility in terms of cabinetry placement, ventilation, and even design style. You’re not forced to blend the aesthetic of the kitchen with the adjacent spaces.

Assessing Your Lifestyle Needs

When choosing between an open and closed kitchen, it’s essential to consider how you use your kitchen. Are you someone who entertains often? Do you like chatting with your family while you prepare meals? Or do you prefer to retreat into the kitchen and enjoy the process quietly?

Open kitchens work well for extroverted homeowners who love to be in the middle of activity, even while cooking. Families with children also benefit from the open sight lines and easy supervision.

On the contrary, if your household is busy and noisy, a closed kitchen can provide a much-needed boundary between chaos and concentration. The separation can help minimize interruptions, and more importantly, contain odors and sounds from appliances.

Also consider your cooking style. If you use many spices, cook frequently with oil, or create meals with strong aromas, a closed kitchen might make sense from a maintenance and cleanliness perspective.

Considering Space and Layout

Your home’s existing architecture plays a huge role in determining whether an open or closed kitchen makes more sense. If you’re working with limited square footage, an open kitchen can make the space feel larger by eliminating visual barriers. It creates an expansive atmosphere, even in small homes or apartments.

Open kitchens are ideal for layouts like lofts, condos, or bungalows that benefit from a more integrated living space. Removing walls can flood your kitchen and adjoining areas with natural light, enhancing the sense of openness.

In contrast, homes that already have defined rooms with more traditional layouts may lend themselves better to closed kitchens. This is especially true if structural walls are load-bearing and expensive to remove.

Acoustic and Odor Control

A crucial consideration that often gets overlooked is how open and closed kitchens affect noise and smell in the home. In open kitchens, the clatter of pots and pans, the hum of dishwashers, or the sizzling of a skillet can echo throughout the house.

If your living area doubles as a workspace, or if quiet is important to your lifestyle, the lack of acoustic separation in an open layout might become a frustration.

Similarly, odors from cooking—whether delightful or not—will freely circulate in an open kitchen. This could be off-putting if your dining area or living room shares the same space. Closed kitchens naturally contain odors more effectively and allow for more targeted ventilation solutions like range hoods and exhaust fans.

Storage and Design Freedom

One of the strongest arguments for closed kitchens is the ability to maximize cabinetry and wall space. In a closed layout, every wall can be used for cabinets, shelving, or even pantries. You’re not constrained by needing to maintain visual cohesion with other parts of the home.

In open kitchens, however, the design needs to flow seamlessly into the living and dining areas. This often limits your choice of finishes and materials and may reduce wall space for storage or large appliances. Island counters or overhead cabinets might be your only options for maximizing storage, which could require more creativity and planning.

Budget Implications

Renovation budgets can also be impacted by your kitchen layout decision. Converting a closed kitchen into an open layout typically involves structural work—removing walls, possibly rerouting HVAC, electrical, or plumbing, and upgrading finishes throughout the newly combined space.

These changes can add significant cost to your renovation. But the trade-off might be worth it for increased home value and improved aesthetics, particularly in urban or modern homes.

On the other hand, sticking with a closed kitchen layout may allow you to focus your budget on high-end appliances, custom cabinetry, or other design features without spending on extensive demolition or structural changes.

Resale Value and Market Trends

If you plan to sell your home in the near future, it’s wise to consider which layout has more market appeal in your area. Open kitchens continue to dominate real estate listings, especially among younger buyers looking for a contemporary, connected lifestyle. An open layout may make your home feel more modern and inviting to prospective buyers.

However, closed kitchens aren’t necessarily a liability. In high-end homes or regions where formal entertaining is still valued, a well-designed closed kitchen can stand out as a feature rather than a drawback. If your neighborhood has a mix of demographics and preferences, then either layout could be appealing depending on how it’s executed.


Hybrid Layouts: The Best of Both Worlds?

If you’re struggling to choose between open and closed kitchens, you don’t have to commit fully to one style. A growing trend in modern renovations is the semi-open or hybrid kitchen. These designs use partial walls, glass dividers, sliding doors, or even large pass-throughs to create flexible boundaries.

This approach maintains visual connection without fully exposing the kitchen at all times. It’s a smart compromise for households that want openness without losing the option for privacy, sound control, or aesthetic separation.

For example, using a sliding partition allows you to close off the kitchen when cooking but open it up for entertaining. Glass dividers help retain light while still keeping a boundary.

Choose What Works for You

At the end of the day, the decision to go with an open or closed kitchen comes down to your personal lifestyle, habits, and home structure. Trends come and go, but your renovation should reflect the way you live now—and ideally how you plan to live in the future.

Consider the practical elements like ventilation, noise, layout, and storage alongside your emotional needs—whether you want a bustling family kitchen or a quiet space to retreat. Speak with your contractor or interior designer about hybrid options if you find yourself torn between the two.

Whether your kitchen opens to the whole world or tucks itself neatly behind a door, the goal is the same: to create a space that brings function, comfort, and joy into your everyday life.

The Best Time of Year to Begin Home Maintenance & Renovations

The Best Time of Year to Begin Home Maintenance & Renovations

Timing plays a significant role in the success of any home improvement project. Whether you’re planning to repaint the walls, remodel your kitchen, or tackle a full-scale renovation, starting at the right time of year can help you save money, avoid weather-related delays, and ensure contractors are available. Different seasons offer different advantages depending on the type of work involved. Understanding when to begin home maintenance and renovations is essential for homeowners looking to protect their investment and maximize the results of their efforts.

Understanding Seasonal Influences on Home Projects

Home maintenance and renovation projects don’t exist in a vacuum—they’re closely tied to the seasons. Weather patterns, availability of professionals, cost fluctuations, and even daylight hours can influence how efficiently a project can be completed. The right season can enhance productivity, reduce delays, and improve the overall outcome. So when should you start?

Spring: Ideal for Fresh Starts and Outdoor Projects

Spring is one of the most popular seasons for beginning home maintenance and renovation. As the weather warms and the days lengthen, homeowners feel energized to refresh their living spaces. This season is ideal for both interior and exterior projects, especially after the wear and tear caused by winter.

Roof inspections and repairs are often scheduled in spring, as melting snow and ice can reveal leaks or damage that need immediate attention. Gutter cleaning and drainage assessments are also crucial to prevent water damage from spring rains. It’s a good time to start landscaping, deck construction, or repainting the home’s exterior, thanks to the mild temperatures and reduced chance of extreme weather.

Inside the home, spring inspires updates like bathroom renovations, flooring upgrades, and kitchen remodels. Since the weather is neither too hot nor too cold, ventilation for painting, sanding, or refinishing projects is easier to manage. Another benefit is the availability of tax returns, which many homeowners use to fund their springtime renovations.

However, since spring is a popular time for home improvement, contractors often become busy quickly. Planning and booking professionals in advance is crucial if you want to take full advantage of this productive season.

Summer: The Peak Season for Major Construction

Summer is often seen as the optimal time for large-scale renovations and additions. The consistently warm weather makes it ideal for projects that require drying, curing, or working outside for long hours. It’s also the season when families can schedule vacations and temporarily move out while major work is underway.

Projects like building home additions, installing new roofing, or tackling full kitchen overhauls thrive during summer. The warm, dry climate allows for uninterrupted progress, reducing the risk of weather-related delays. Window replacements and HVAC upgrades also make sense during this season, especially before the peak of summer heat hits.

School being out can make scheduling easier for families with children, and long daylight hours give contractors more time to work each day. For those planning to sell their home, summer renovations can add quick curb appeal that aligns with peak real estate season.

That said, summer has its drawbacks. It’s the busiest time of year for contractors, so finding availability can be challenging if you haven’t scheduled in advance. Materials can also be in higher demand, leading to increased prices. Plus, working in high heat can cause discomfort and may even slow down progress on certain tasks. Nevertheless, with proper planning, summer can be one of the most productive times for home improvements.

Fall: Perfect for Pre-Winter Prep and Interior Upgrades

Fall is an excellent time to tackle maintenance and renovations, particularly for homeowners who want to ensure their property is winter-ready. This season is ideal for completing tasks that may have been delayed during the summer or for switching the focus to indoor improvements.

Exterior tasks such as sealing driveways, repairing roofs, cleaning chimneys, or updating insulation should be completed before colder temperatures set in. Fall is also the perfect time to check weather stripping and windows for drafts. By improving energy efficiency now, homeowners can reduce heating costs when winter arrives.

Inside the house, fall is a great time for painting, lighting updates, kitchen refinishing, and flooring installations. Contractors often become more available in the fall as summer demand subsides, and prices on materials may begin to dip as suppliers clear out seasonal stock.

Renovating during the fall also means your home will be fresh, clean, and ready for the holidays. Whether you’re expecting guests or planning cozy winter nights at home, fall maintenance ensures everything runs smoothly and looks its best.

The biggest consideration in fall is timing—start too late, and you might get caught in early winter storms or freezing temperatures. Begin your projects early in the season to stay ahead of the weather.

Winter: A Strategic Time for Indoor Renovations

Winter is generally considered the slow season for home renovations, but that doesn’t mean it’s a bad time to start a project. In fact, for certain types of work, winter can be the perfect season—especially for indoor projects that don’t require opening the house to the elements.

Since demand for contractors typically dips during the colder months, you may find better pricing and more scheduling flexibility. Winter is a good time to renovate bathrooms, finish basements, repaint interiors, or upgrade lighting and fixtures. These projects can be completed in a temperature-controlled environment without interference from outside conditions.

Another advantage is the lead time it offers. If you start planning or executing a winter renovation, you can complete everything before spring arrives, avoiding the rush and securing lower rates on materials and labor.

However, outdoor work is significantly limited in winter. Cold temperatures and snow can halt projects that involve concrete, excavation, or extensive roof work. Ventilation for painting or sanding may also be a challenge if the home needs to remain sealed for warmth. As long as your renovations are limited to interior updates, winter can be an efficient and cost-effective time to make improvements.

Choosing the Right Time Based on Project Type

The best time to begin home maintenance and renovations also depends heavily on the type of work being done. For example, painting exteriors, pouring concrete, and landscaping should be avoided in extreme temperatures or heavy rainfall seasons. On the other hand, indoor remodeling like cabinetry work or tiling is less dependent on the weather and can be scheduled year-round.

If your project involves structural changes or permits, you’ll also need to consider your local government’s seasonal schedules and inspection timelines. Some municipalities experience permitting delays during certain times of the year due to staffing or backlogs, which can impact your timeline.

Custom-built items like cabinetry or countertops can take weeks or even months to arrive. So if you’re planning a renovation that requires specialty items, factor in the lead time and order materials well in advance—especially during holidays or supply chain fluctuations.

Planning Is More Important Than the Season

Ultimately, while certain times of year are better suited for specific projects, the most critical factor in successful renovations is planning. Homeowners who start early—regardless of the season—are more likely to finish on time and within budget. This includes defining the project scope, securing permits, choosing materials, booking contractors, and setting realistic timelines.

By aligning your project with the right season and putting effort into thorough planning, you’ll avoid last-minute stress and unexpected setbacks. Whether you’re refreshing your home’s appearance or making necessary upgrades, good timing adds both comfort and efficiency to the process.

Timing Sets the Tone

Understanding the seasonal rhythm of home maintenance and renovations gives homeowners a distinct advantage. Spring and summer are perfect for outdoor work and major overhauls, while fall and winter allow for smart, cost-effective interior upgrades. Still, every home and homeowner is different. Your personal schedule, budget, and the nature of your project will influence the ideal start time.

With thoughtful planning and seasonal awareness, your home improvements will not only look great but also endure the test of time. Whether you’re sealing cracks before the frost hits or building your dream deck in the sunshine, choosing the right moment to begin makes all the difference in a successful renovation journey.

Maximizing Window Use in Home Maintenance & Renovations

Maximizing Window Use in Home Maintenance & Renovations

Windows play a far more integral role in home maintenance and renovations than many homeowners realize. While often seen simply as sources of light and ventilation, windows are also key architectural features that influence energy efficiency, comfort, aesthetics, and even property value. As home renovation trends continue to emphasize natural elements, sustainability, and open spaces, maximizing window use has become essential to smart home upgrades.

Understanding the importance of windows and knowing how to optimize their function and form can transform any renovation project. Whether you’re maintaining an older property or building an addition, strategic window use can make a significant difference in the final outcome.

Evaluating the Existing Window Setup

Before beginning any renovations, it’s essential to assess your current window setup. Older homes may have single-pane glass, inefficient seals, or outdated frames that allow heat loss and drafts. Some may have oddly placed windows that fail to capture sunlight properly or overlook unattractive views. Evaluating their size, placement, materials, and functionality should be one of the first steps in your renovation planning.

Beyond visual inspection, it helps to take note of how your windows interact with the seasons. Do certain rooms overheat in summer or remain too cold in winter? Does sunlight fade your furniture? Does humidity build up around certain window frames? All of these are indicators of inefficiency or missed opportunities in your current window configuration.

By identifying the weak points, you can develop a clearer picture of where improvements or replacements are most needed. From there, you can strategize how to best incorporate your windows into a larger maintenance or renovation plan.


Embracing Natural Light for Energy Efficiency

One of the most compelling reasons to focus on window improvements is the opportunity to harness natural light. Daylighting—designing interiors to maximize natural light—reduces reliance on artificial lighting, which lowers electricity bills and creates a more inviting atmosphere.

Larger windows, transom windows, or clerestory placements can brighten up formerly dim areas of the home. When renovating kitchens, bathrooms, or hallways, these lighting enhancements help improve visibility without increasing your energy usage. Additionally, using skylights or solar tubes can bring light into spaces where traditional windows are not feasible.

Window placement matters greatly in this context. South-facing windows typically capture the most sunlight throughout the day in northern hemisphere homes, while north-facing windows provide softer, more consistent light. East-facing windows bring in morning light, which can be perfect for breakfast nooks or home offices, while west-facing ones offer warmer light in the late afternoon.

To control solar gain, especially in hot climates, consider using window films, low-emissivity (Low-E) glass, or well-placed shades and overhangs. These can help balance natural light with temperature control, making rooms more livable year-round.

Enhancing Ventilation and Indoor Air Quality

Windows are a primary source of ventilation, which directly impacts indoor air quality. In renovations, especially in older homes that may lack proper airflow, strategically improving window function can dramatically improve comfort and health.

Casement and awning windows are particularly effective for ventilation because they open outward, catching breezes more effectively. Double-hung windows offer flexible ventilation, allowing air to flow from both the top and bottom sash. Placing operable windows on opposite walls or across from doors can create natural cross-ventilation, flushing out stale air and bringing in fresh outdoor air.

This natural air exchange helps to reduce humidity, odors, and allergens—especially important in bathrooms, kitchens, and laundry areas. As part of a renovation, replacing fixed windows with operable ones in these spaces can provide both practical benefits and long-term energy savings by reducing reliance on fans or dehumidifiers.

Prioritizing Window Insulation and Weatherproofing

Even the most attractive or well-placed windows can become liabilities if they’re poorly insulated. Drafty windows allow conditioned air to escape, leading to higher energy bills and a less comfortable home. One of the best maintenance practices during a renovation is to inspect all window frames, seals, and panes for leaks and inefficiencies.

Weatherstripping, caulking, and foam insulation are cost-effective maintenance solutions that extend the life of existing windows. For those with older single-pane units, installing storm windows can be a temporary upgrade until you’re ready for full replacements.

However, during a major renovation, upgrading to double- or triple-pane insulated windows with argon gas and Low-E coatings provides superior protection. These modern windows maintain interior temperatures more effectively and reduce outside noise—a great bonus if you live in a busy neighborhood.

Window performance ratings, like the U-factor and Solar Heat Gain Coefficient (SHGC), help guide decisions for replacements. A lower U-factor means better insulation, and a lower SHGC means better control over solar heat. These ratings are especially helpful when tailoring your renovation for local climate conditions.

Expanding Views and Blending Indoor-Outdoor Living

Modern renovations increasingly emphasize the connection between indoors and outdoors. Expansive windows, sliding glass doors, and folding window walls help blur the boundaries between living spaces and exterior environments. These elements not only provide stunning views but also foster a stronger connection to nature.

If your renovation involves the living room, dining room, or a master suite, consider whether you can expand window openings or install larger glass panels. Floor-to-ceiling windows or picture windows dramatically change how a space feels, instantly adding luxury and openness.

Beyond just adding size, consider the orientation of the views. Frame garden spaces, patios, or tree lines rather than fences or neighboring homes. Use landscaping as a way to enhance what your windows reveal. Even narrow sidelights flanking doors can create a more elegant entrance and make tight foyers feel more expansive.

Choosing the Right Style for Architectural Cohesion

As with all renovation choices, style matters. Your window choices should complement the architecture of your home, whether you’re maintaining a historic aesthetic or modernizing a dated design.

For example, craftsman homes pair well with divided light windows and wood frames, while mid-century modern designs favor horizontal sliders and large, unobstructed glass panes. Colonial-style homes look best with symmetrical window placements and shutters, while contemporary homes often utilize large, minimalist panels.

During renovations, mismatched windows can disrupt the visual harmony of your home’s exterior. Ensure consistency in frame color, grid patterns, and sill treatments across all visible sides of the home. For more daring renovations, using contrast—like black frames on white walls—can modernize a home while still maintaining architectural balance.


Factoring in Privacy and Light Control

Maximizing window use doesn’t just mean letting light pour in freely. In some cases—like bathrooms, bedrooms, or urban homes—privacy is a concern. The solution lies in design and material choice rather than eliminating windows altogether.

Frosted or textured glass provides light while obscuring views. Top-down, bottom-up shades let you control which part of a window is exposed. Interior shutters, sheer curtains, and layered drapes allow homeowners to adapt to changing needs throughout the day.

During renovations, consider installing windows higher on the wall, using narrow vertical windows, or incorporating clerestory openings in private spaces. These maintain light flow without sacrificing seclusion.

Long-Term Benefits of Smart Window Renovations

When maintained and upgraded properly, windows can significantly extend the functional lifespan of a home. They add energy efficiency, natural lighting, ventilation, and beauty—all of which improve your daily life and boost resale value.

Today’s renovations are increasingly smart-tech driven, and windows are no exception. Integrating motorized blinds, smart glass that tints automatically, or even window sensors for home security systems can modernize your home and add convenience.

Over time, these improvements not only reduce operational costs but also position your home as forward-thinking and eco-conscious—an attractive selling point in any real estate market.

Maximizing window use in home maintenance and renovations is not simply a matter of aesthetics—it’s a strategic approach that blends beauty with efficiency and sustainability. From better lighting and air quality to architectural harmony and energy savings, windows are powerful tools in reshaping your home for modern living.

By evaluating existing features, investing in insulation, embracing natural light, and respecting your home’s design integrity, you can turn your windows into standout elements of your renovation. Whether you’re updating a single room or planning a full remodel, the smart use of windows can elevate your home’s comfort, character, and overall value in ways that are both subtle and substantial.

How to Upgrade Railings in Home Maintenance & Renovations

How to Upgrade Railings in Home Maintenance & Renovations

When it comes to home maintenance and renovations, it’s often the subtle details that make the biggest impact. Railings—whether lining staircases, balconies, decks, or porches—are one of those architectural features that are frequently overlooked, yet they play a vital role in both safety and aesthetics. Upgrading your railings can instantly transform the visual appeal of a space while ensuring the structure complies with modern safety standards. This blog explores how to approach upgrading railings as part of your home renovation plans and why this update can significantly elevate your home’s value and style.

Understanding the Purpose of Railings

Before diving into design trends or materials, it’s important to recognize why railings matter. Functionally, railings provide necessary support and prevent accidents, especially in areas with elevation changes like stairs or elevated decks. But they also define boundaries, direct foot traffic, and visually anchor architectural elements.

In older homes, railing systems may be outdated, unstable, or not up to current building codes. Some may show wear and tear or feel flimsy. Others may simply clash with newer interior styles. Whether you’re addressing interior staircases or exterior porches, giving your railings an upgrade should be viewed as both a safety measure and a design opportunity.

Evaluate the Existing Railing Condition

The first step in upgrading railings is a thorough evaluation of your current setup. Are your stair railings loose? Is the deck railing rusted or splintering? Do the designs feel dated, or is the material deteriorating from exposure to weather or age? An honest assessment will guide whether you can retrofit your existing railings or need a full replacement.

Interior railings often suffer from shaky posts or wobbly handrails, while outdoor railings may show corrosion, mold, or wood rot. In some cases, a fresh coat of paint or sealant might be enough, but many situations call for a more comprehensive upgrade.

Aligning with Safety and Building Codes

While style matters, safety comes first. Every municipality enforces building codes that dictate railing height, spacing, and load-bearing requirements. For instance, most stair railings must be between 34 to 38 inches in height, and baluster spacing usually can’t exceed 4 inches to prevent children from slipping through.

If you’re upgrading an older home, chances are the existing railings may not meet these modern standards. This makes a professional consultation important, especially if the railing system supports a large span or exists on a second story or higher. Proper anchoring and structural support must be ensured to avoid liability or hazard.

Choosing the Right Material

One of the most exciting aspects of upgrading railings is choosing the material. Each has its own aesthetic and functional benefits. The most popular choices today include:

Wood: A classic option that suits both traditional and rustic styles. It can be painted, stained, or carved for customization. However, it does require regular maintenance, especially for outdoor use.

Metal: Wrought iron, aluminum, and steel offer a sleek, durable alternative that fits both modern and vintage homes. Powder-coated aluminum, for example, is corrosion-resistant and low-maintenance.

Glass: For contemporary interiors or open-view balconies, glass panels framed in wood or metal offer a luxurious, airy feel. They also make small spaces appear larger but need regular cleaning to stay clear.

Cable: Stainless steel cable railings are increasingly popular in modern homes. They offer a minimalist aesthetic and preserve sightlines, especially in scenic outdoor settings.

PVC or Vinyl: An economical, low-maintenance solution often used for deck railings. While not as premium-looking as wood or metal, they serve their purpose effectively and resist weather damage.

Blending Railings with Your Home’s Style

A railing upgrade isn’t just about choosing a new material—it’s about integrating it into the overall character of your home. Your selection should enhance existing architectural features. If you’re going for a farmhouse look, white-painted wooden railings with decorative spindles might be ideal. For a sleek urban interior, black metal or cable railing could create the desired contrast.

Don’t forget about the handrail and post caps—these small details can dramatically impact the final look. Curved ironwork can add elegance, while chunky wooden newel posts bring warmth and craftsmanship.

Lighting can also be added for ambiance and safety. Recessed lights, post-top fixtures, or integrated LED strips in handrails are great additions that combine functionality with visual appeal.

DIY vs. Hiring a Professional

Many homeowners contemplate whether they can tackle a railing upgrade as a DIY project. The answer depends on the complexity of the job. If you’re replacing an interior handrail with a similar model, it might be manageable for an experienced DIYer. However, if the railing involves custom fabrication, high elevation, or compliance with strict safety codes, it’s wise to hire a professional contractor.

Professionals bring not only craftsmanship but also knowledge of local building regulations. They can ensure that posts are securely anchored, fasteners are corrosion-resistant, and that everything aligns properly. A poorly installed railing can compromise safety—and resale value.

Budgeting for a Railing Upgrade

Costs vary widely depending on the materials chosen, length of the railing, and whether you’re doing a full replacement or partial update. A basic wooden stair railing might cost a few hundred dollars, while custom glass panels or wrought iron installations can run into the thousands.

Budgeting should account for demolition of the existing railing, material costs, labor, finishing touches (like painting or staining), and unexpected repairs uncovered during the process (like floor or stair tread damage). It’s also worth budgeting for permits if required in your area.

If funds are tight, consider upgrading only the most visible or worn sections first. You might refinish the handrail now and swap balusters later, or replace the deck railing this season and the stair railing next year. Even small upgrades, like switching outdated spindles for sleeker iron balusters, can refresh the space affordably.

Environmental Considerations and Sustainability

For those concerned about sustainability, several eco-conscious options exist. Reclaimed wood can be repurposed into stunning rustic railings, especially for interior staircases. Metal railings often include recycled content and are fully recyclable themselves. If choosing wood, opt for sustainably harvested varieties like bamboo or FSC-certified hardwoods.

Using durable, low-maintenance materials like powder-coated aluminum also reduces the need for frequent replacements or chemical treatments, making them more environmentally friendly in the long run.

Enhancing Outdoor Spaces with Upgraded Railings

Don’t forget that your outdoor spaces benefit just as much from railing upgrades. Decks, porches, balconies, and staircases exposed to the elements require materials that withstand rain, sun, and seasonal changes. Here, durability takes center stage. Aluminum, vinyl, and treated lumber perform well, while stainless steel cable railings are ideal for coastal or humid environments due to their corrosion resistance.

Updating your deck railing can breathe new life into your backyard. Combined with other small touches like planters, outdoor rugs, and string lighting, it can redefine the entire ambiance.

How to Add a Reading Nook During Home Maintenance & Renovations

How to Add a Reading Nook During Home Maintenance & Renovations

In the flurry of decisions that come with home maintenance and renovations, it’s easy to get swept away by big-ticket improvements like kitchen remodels, new flooring, or expanded living spaces. But often, it’s the small, personal additions that bring the most lasting joy. One such feature is a reading nook—a cozy retreat within your home that offers calm, comfort, and an invitation to slow down. Whether you’re making major upgrades or simply reimagining underused corners, incorporating a reading nook during your renovations is a clever way to add charm and functionality. Let’s explore how you can thoughtfully plan and build one during your renovation journey.

Why Include a Reading Nook in Your Renovation?

Before diving into the how, consider the why. Reading nooks offer more than aesthetic appeal. They provide a dedicated space for quiet, reflection, imagination, and mindfulness. In an age of noise and digital distraction, a reading nook is a rare sanctuary. If you’re already investing in home upgrades, adding this small feature can feel like a rewarding indulgence without blowing the budget.

Moreover, a reading nook can be tailored to your home’s layout—whether that means utilizing an awkward alcove, converting a bay window, or carving out space beneath a staircase. It’s an opportunity to enhance both your home’s personality and its practicality.

Choosing the Right Spot

The most important step in adding a reading nook is choosing the right location. While your renovation may include large, open areas, the best nooks are often found in compact, overlooked spaces. During home maintenance and remodeling, you may discover new potential zones—like unused closet space, a corner by a window, or even a widened hallway.

Natural light is an important factor. A window-side nook brings warmth and ambiance, while also providing ventilation and a view. If natural light isn’t available, don’t worry—thoughtful lighting choices can make even the darkest corners feel inviting.

Stairs often leave behind underutilized triangular cavities, and these can be transformed into magical mini-libraries or hideaways. Alternatively, the top of a staircase landing or an attic dormer could be redesigned to serve as a peaceful reading zone.

Designing for Comfort and Aesthetics

A reading nook should invite you to stay. It should be so comfortable that once you settle in, time slows down. When planning your renovations, talk to your contractor or designer about integrating custom elements like built-in benches, padded window seats, or shelving that blends into the architecture.

Upholstery plays a huge role in comfort. Consider seat cushions with high-density foam, plush throw pillows, and warm blankets. Choose fabrics that are cozy yet durable, especially if the nook will get daily use.

Walls can be painted in soft, calming hues—think muted greens, deep blues, or gentle creams. These tones support a restful environment. For more personality, consider wallpaper, wood paneling, or even a statement wall with framed literary quotes or artwork.

And don’t forget flooring. If your home renovation includes new floors, reserve a soft rug or carpeting for the nook to help define the space and keep it feeling grounded.

Integrating Storage Smartly

Reading means books—and books need homes. A well-designed reading nook isn’t complete without storage. Renovation is the perfect time to include custom shelving, floating shelves, or cabinetry that fits seamlessly with your home’s existing design.

If you’re building a bench seat, make it multi-functional with hidden storage underneath. Drawers or lift-up lids are ideal for stashing away books, extra pillows, or even board games and stationery.

For tighter spaces, vertical storage works wonders. Floor-to-ceiling shelving not only maximizes use of space but also adds visual drama, especially when styled with books, plants, and meaningful objects.

During renovations, it’s easier to run wiring or make structural changes, so use that opportunity to wire in recessed lights within bookshelves, or even add a charging station hidden in the seating area for e-readers or lamps.

Lighting: The Heart of the Nook

Lighting sets the mood of a reading nook. Natural daylight is ideal, but once the sun goes down, soft artificial light becomes essential. During your renovation, ask your electrician to install wall sconces, overhead pendant lights, or adjustable lamps designed specifically for reading.

Consider dimmable lights to give you control over the atmosphere. Soft white bulbs that mimic natural light are best, as they reduce eye strain. If your nook includes built-in shelving, integrated lighting can help showcase your books while providing functional illumination.

Smart lighting, which can be controlled via app or voice, can also be a small upgrade with big impact. Being able to set a cozy lighting scene with a simple command adds a touch of luxury to the experience.

Personalizing the Space

A reading nook should feel like your own world. It’s more than just a seat with a lamp—it’s an extension of your personality. During renovations, while materials and finishes are being selected, carve out time to think about how you want the nook to reflect you.

Maybe you love the rustic charm of reclaimed wood and vintage finds. Or perhaps you’re drawn to modern minimalism, with sleek lines and neutral tones. Whatever your style, a reading nook is a great opportunity to play with textures and details on a small scale.

Add layered textiles like chunky knit throws, linen cushions, or a leather footstool. Bring in greenery with potted plants or hanging vines. Display a curated selection of your favorite titles alongside small souvenirs or personal mementos.

If you have children or teens, consider creating a shared family nook or adding a separate kid-friendly version filled with colorful books, soft lighting, and whimsical decor.

Working Around Maintenance Tasks

If your renovation includes structural repairs, electrical work, or HVAC updates, take advantage of that chaos to prepare your reading nook properly. For example, if walls are being opened up for insulation or wiring, that’s the best time to add in outlets, recessed lighting, or even speakers if you want ambient music.

Ask your contractor if you can reroute ductwork or modify a closet space to carve out room. Adding a nook isn’t typically disruptive if you plan it early. Since it usually doesn’t require major plumbing or appliance changes, it can be one of the simpler but most rewarding additions.

Also, while flooring is being changed or walls are being painted, consider materials that extend to the nook for visual continuity—or choose different finishes to help define it as a separate zone within a room.

Budget-Friendly Nook Ideas

Not every reading nook has to be a custom build. If your renovation budget is tight, there are still plenty of creative ways to make a cozy space. Repurpose furniture you already own, like an armchair, a small side table, and a standing lamp.

Use renovation scraps creatively. Leftover wood can be turned into shelves or a bench. Leftover paint can be used to give the nook its own signature color. Even old cabinets can be upcycled into storage pieces.

Window treatments, rugs, and soft furnishings can make a big difference even without custom carpentry. Focus on creating a mood and a sense of comfort—it doesn’t have to be costly to be effective.

Lasting Value of a Reading Nook

Beyond its function, a reading nook adds value to your home, both emotionally and financially. Buyers are often drawn to unique spaces that suggest comfort and lifestyle. A reading nook signals that your home is more than just functional—it’s a place where people can rest and recharge.

For your own family, it becomes a retreat that encourages unplugging and slowing down. It can be a space to share stories with your children, unwind after work, or simply escape into a book for an hour. In a world that rarely stops moving, a nook offers a stillness that’s hard to replicate elsewhere.

Incorporating a reading nook during home maintenance and renovations is a choice that blends practicality with personal joy. Whether it’s carved into a bay window, tucked beneath a staircase, or designed as a built-in bench beside the fireplace, this small space can carry big emotional weight. It invites you to pause, breathe, and enjoy the simpler pleasures of home.

So as you tackle upgrades, repairs, and reconfigurations, consider making room for one quiet corner. Let your renovation not only improve your home’s value, but also its soul—one page, one pillow, one peaceful moment at a time.

Matching Fixtures and Hardware in Home Maintenance & Renovations

Matching Fixtures and Hardware in Home Maintenance & Renovations

When it comes to home maintenance and renovations, the big picture often steals the spotlight—new flooring, cabinetry, fresh coats of paint, or reconfigured layouts. But as any experienced designer or seasoned homeowner will tell you, the details are where a project comes to life. Among these details, fixtures and hardware play a quietly powerful role. Whether you’re updating a single room or undertaking a full renovation, achieving cohesion through matching fixtures and hardware can elevate the space, create visual harmony, and reflect thoughtful design.

Why Fixtures and Hardware Matter

Fixtures and hardware are the finishing touches that bring style and personality to a space. They include doorknobs, cabinet handles, light switch plates, faucets, light fixtures, drawer pulls, towel bars, and hinges—essentially the jewelry of your home. When mismatched or overlooked, they can disrupt the flow of an otherwise well-designed room. But when chosen with intention, they tie together design elements, making the entire space feel complete.

From a functional standpoint, fixtures and hardware are used daily. They should not only look good but also provide durability and comfort. Selecting high-quality pieces that match the room’s style and color scheme adds both visual appeal and longevity to your renovations.

Establishing a Style Direction

Before choosing fixtures and hardware, it’s essential to determine the overall style you want your space to reflect. Is your renovation leaning modern, industrial, rustic, traditional, farmhouse, or transitional? Each style has distinct characteristics that can guide your decisions. For example, a modern home may feature sleek, brushed nickel or matte black hardware, while a traditional home might call for polished brass or antique bronze finishes.

Defining your style helps eliminate guesswork. It streamlines your selection process and ensures all elements—from cabinet knobs to pendant lights—work in harmony. If you’re mixing styles between rooms, aim for some level of continuity to avoid a jarring transition. Matching fixtures across rooms doesn’t mean everything has to be identical, but there should be an underlying visual connection.

Color and Finish Consistency

One of the most crucial elements of matching fixtures and hardware is consistency in finish. While it’s possible to mix metals and finishes when done intentionally and skillfully, beginners often find better results by sticking to a unified look. Chrome, brushed nickel, oil-rubbed bronze, matte black, brass, and antique finishes each evoke a different feel. Mixing them without a plan can make the space appear disjointed.

For example, pairing a brushed nickel faucet with chrome cabinet pulls may create a visual clash, especially in smaller spaces like bathrooms or powder rooms. On the other hand, choosing brushed nickel across all visible hardware provides a subtle, cohesive look.

Some homeowners do opt for mixed finishes, often combining two complementary tones—such as matte black and warm brass—to add dimension. If you go this route, apply the mix uniformly across the space. For example, light fixtures and cabinet pulls could be matte black, while faucets and towel bars are brass, all within a palette that complements your wall color, tiles, and countertops.

Matching Hardware Across Rooms

When renovating an entire home, coordinating hardware from room to room creates a fluid and intentional design. This doesn’t mean every fixture must be identical throughout the house, but echoing certain finishes or shapes from one space to the next offers continuity.

If your kitchen features matte black cabinet handles and pendant lights, consider using similar black fixtures in nearby areas like the dining room or entryway. This subtle repetition tells the eye that everything belongs together. For bedrooms and bathrooms, repeating the hardware finish on door handles and vanity fixtures continues the visual rhythm.

This approach is particularly important in open-concept layouts, where different rooms are visible from a single vantage point. A mismatched finish in one area can become an eyesore if it disrupts the cohesive flow.

Updating Fixtures During Maintenance

Home maintenance doesn’t always require full renovations. Often, simple upgrades to hardware can breathe new life into a tired space. Replacing outdated or worn-out fixtures is one of the most cost-effective and straightforward ways to refresh a room.

For instance, swapping old brass doorknobs with satin nickel handles or modern lever designs can modernize your home without major construction. Replacing yellowed plastic light switch covers with brushed metal or clean white alternatives instantly elevates the space.

Similarly, if you’re painting kitchen cabinets or walls as part of regular maintenance, take the opportunity to update the knobs and pulls to match the new aesthetic. These small changes, when coordinated with the room’s color scheme and overall look, make a big difference in the home’s perception and resale value.

Combining Function with Aesthetics

Fixtures and hardware are not just about looks. Functionality is equally important. Well-designed hardware should be comfortable to use, durable over time, and suitable for the specific needs of the room. A stunning matte black faucet may look fantastic but could show water spots more easily than brushed finishes, requiring more maintenance. Likewise, tiny cabinet knobs may look chic but be difficult for some family members to grip.

When choosing matching hardware, always balance form with function. Think about who uses the space, how often it’s cleaned, and what level of wear and tear the hardware will endure. Soft-close drawer mechanisms, child-friendly rounded handles, and water-resistant finishes are examples of functional enhancements that don’t compromise style.

Lighting Fixtures: A Key Element

Lighting is often considered a separate design category, but it should be included when planning matching fixtures and hardware. Light fixtures—especially ceiling mounts, chandeliers, and sconces—are major visual anchors. Their finishes and forms should align with other hardware in the room to create visual unity.

For example, in a bathroom with polished chrome faucets and towel bars, a chrome vanity light completes the look. In the kitchen, coordinating the pendant lights with cabinet hardware ties the design together. When selecting lighting for hallways or bedrooms, try to stay within the same finish family for a consistent aesthetic.

Also, consider the style of the light fixture itself. Industrial pendant lights may not pair well with vintage-inspired cabinet handles, even if their finishes match. Design cohesion comes from both material and design language.

Custom Solutions and Unique Touches

While matching fixtures create harmony, they also offer an opportunity to inject personality into your space. Custom hardware solutions, such as artisan-crafted cabinet pulls or hand-forged light fixtures, add unique flair while maintaining a consistent finish or form.

You can also blend personal expression with design unity by selecting matching hardware in a signature shape—say, geometric lines or ornate curves—across different rooms. This level of customization helps you tell a design story throughout your home without compromising on cohesion.

Renovation Timing and Installation Tips

When incorporating new hardware into a renovation project, timing is everything. Fixtures and hardware are often among the last items installed, but decisions should be made early. Planning ahead ensures compatibility with cabinetry, doors, plumbing, and electrical systems.

For example, choosing a faucet with a widespread base before your countertop is cut can prevent misalignment. Similarly, selecting lighting early ensures proper junction box placement. This proactive approach reduces costly changes later in the renovation and prevents mismatched elements from being installed at the last minute.

Always ensure proper installation. Poorly aligned drawer pulls or wobbly towel bars undermine the professionalism of your renovation. Measure carefully, use templates when necessary, and invest in quality fasteners to secure every component.

The Power of Intentional Design

Matching fixtures and hardware in home maintenance and renovations may seem like a small detail, but it carries immense design weight. These subtle elements knit a space together, reflect your personal style, and demonstrate your attention to quality and care. Whether you’re doing a full-scale remodel or just replacing outdated doorknobs, taking the time to choose coordinating finishes and styles ensures a polished, cohesive look.

Intentionality is key. By making thoughtful decisions about fixtures and hardware, you transform routine maintenance into an opportunity to refresh your space and elevate your home’s character. In the end, it’s the harmony of the details that makes a house feel beautifully complete.

Adding Value with Ceiling Design in Home Maintenance & Renovations

Adding Value with Ceiling Design in Home Maintenance & Renovations

Ceiling design is often an overlooked aspect of home maintenance and renovations. While walls, floors, and furnishings tend to steal the spotlight, the ceiling has the potential to dramatically enhance the aesthetics, comfort, and even value of your home. With careful planning and creativity, ceiling design can serve as a powerful feature that unifies interior spaces and reflects your personal style while boosting market appeal. Whether you’re updating a single room or undertaking a full-scale renovation, strategic ceiling enhancements can transform your home into something truly exceptional.

Understanding the Role of Ceilings in Home Design

In many homes, the ceiling is treated as little more than a blank canvas—flat, white, and purely functional. But in reality, it’s a surface that occupies just as much visual real estate as the floor, and can either elevate or diminish the perceived elegance of a space. From adding depth and architectural interest to improving acoustics and lighting dynamics, the ceiling plays a critical role in shaping the atmosphere of a room.

Ceiling design can range from simple upgrades like crown molding and fresh paint to more elaborate installations such as coffered panels, tray ceilings, exposed beams, or even contemporary materials like metal or wood slats. The type of ceiling you choose should reflect the function of the room, the overall design scheme of your home, and the feeling you want to evoke in that space.

Increasing Property Value Through Visual Impact

A well-designed ceiling adds sophistication and uniqueness, which directly contributes to perceived property value. Buyers are always drawn to homes with features that stand out, and custom ceiling work can quickly become a memorable talking point. Real estate professionals often note that standout architectural elements, including ceilings, can help a property sell faster and at a higher price.

For example, a tray ceiling in a dining room or master bedroom can make the space feel more luxurious. Exposed beams in a living room create a rustic or industrial edge that appeals to modern tastes. Even subtle changes, like adding tongue-and-groove wood panels or decorative ceiling medallions, can provide the kind of detail-oriented finish that impresses both guests and buyers.

Moreover, ceiling upgrades can enhance the symmetry and cohesion of your interior design, tying together color palettes, light fixtures, and furniture arrangements in a way that feels intentional and curated.

Integrating Lighting into Ceiling Designs

Lighting plays an essential role in ceiling design. Integrating lighting elements directly into the ceiling not only increases functionality but also adds ambiance and depth. Recessed lighting, cove lighting, or backlit ceiling panels can provide a soft glow that enhances architectural features and contributes to the mood of a room.

In open-concept spaces, ceiling lighting can also be used to define different zones. For instance, pendant lights over a kitchen island combined with recessed lighting in the adjacent living room help separate the areas visually without disrupting the flow of the space. Meanwhile, in more formal settings like dining rooms or studies, a chandelier or dramatic fixture set against a textured or painted ceiling can create a luxurious, intentional focal point.

Smart homeowners use ceiling-based lighting design not only to brighten rooms but also to highlight design choices and draw attention to architectural details that might otherwise be missed.

Emphasizing Height and Volume

Ceiling renovations can be particularly impactful in homes with lower ceilings or outdated architecture. By redesigning the ceiling—raising it where structurally possible or even giving the illusion of height through creative use of color, lighting, and paneling—you can open up a space and make it feel significantly more expansive.

Painting ceilings a lighter color than the walls, adding vertical lines or recessed lighting, and even using high-gloss finishes are effective ways to visually stretch a room’s vertical dimensions. For those fortunate enough to have high or vaulted ceilings, adding beams, chandeliers, or layered crown molding draws the eye upward and emphasizes the grandeur of the space.

Ultimately, height manipulation through ceiling design not only improves spatial perception but also enhances the overall comfort and energy of a home.

Utilizing Sustainable and Smart Materials

Sustainability has become a key consideration in modern renovations. Today’s ceiling designs offer an opportunity to incorporate eco-friendly materials and energy-efficient solutions. For example, reclaimed wood beams not only provide character and warmth but also align with green building practices. Similarly, bamboo panels or recycled tin tiles offer a mix of style and sustainability.

Incorporating insulation and soundproofing materials into the ceiling during renovations can also add hidden value, reducing noise between floors and improving energy efficiency. Homes with better insulation tend to stay cooler in summer and warmer in winter, ultimately reducing energy bills—a factor that homeowners and buyers alike appreciate.

Smart technology can also be integrated into ceiling design. Motion-activated lighting, built-in speakers, or climate-control sensors concealed within ceiling panels provide a streamlined, modern living experience that boosts both functionality and marketability.

Personalization and Style Expression

Ceilings offer an excellent opportunity to express personality and creativity. While walls and floors are typically grounded in neutral or safe choices, the ceiling can be a space for bold experimentation. From rich, dark hues in a cozy study to metallic finishes in a modern bathroom or hand-painted murals in a nursery or library, the possibilities are endless.

Patterned ceilings using wallpaper or stenciling can add texture and visual intrigue. Similarly, geometrically arranged panels or tiles can give ceilings a contemporary flair. These details not only set your home apart from cookie-cutter interiors but also reflect a homeowner’s unique taste and artistic sensibility.

A customized ceiling also tells a story—it speaks to the time, effort, and intention behind a renovation. For prospective buyers, these kinds of touches often serve as evidence that the home has been cared for and thoughtfully updated.

Ceiling Renovations for Specific Rooms

Each room in your home can benefit from a tailored ceiling design. In the kitchen, for instance, coffered or beam ceilings can add charm while hiding ductwork or structural components. Combined with pendant lighting, this design approach creates both function and flair.

In bathrooms, ceilings often suffer from moisture damage, especially in older homes. Here, a ceiling renovation might include mold-resistant materials and integrated ventilation systems, contributing to the room’s health as well as its aesthetics.

Bedrooms can benefit from calming designs—soft lighting, gentle curves, and layered textures that encourage rest and relaxation. A tray ceiling with indirect lighting can provide a warm, serene atmosphere that promotes better sleep and peace of mind.

Even in transitional spaces such as hallways or entryways, a ceiling upgrade can leave a lasting impression. Arched ceilings, skylights, or a subtle pop of color above can create a welcoming mood and encourage a sense of flow through the home.

Planning and Execution Considerations

Before embarking on a ceiling renovation project, careful planning is essential. Consider the architecture of your home, the room’s purpose, and your long-term design goals. Structural limitations must be assessed, especially when altering ceiling height or adding heavy beams. Consult with a qualified contractor or architect to ensure safety and feasibility.

Budget is another critical factor. While some ceiling enhancements can be relatively inexpensive—such as repainting or installing crown molding—others may involve framing, electrical work, and significant materials, which can drive up costs. However, many homeowners find that even a moderate investment in ceiling design pays off in long-term value and enjoyment.

Lastly, be sure to coordinate ceiling upgrades with other elements of your renovation to maintain harmony and balance. The ceiling shouldn’t feel disconnected from the walls or floor but should instead contribute to a cohesive design narrative throughout the space.

Looking Up to Add Value

Ceiling design is a powerful, underutilized tool in home maintenance and renovations. Far from being just an afterthought, the ceiling can define a room’s character, enhance its functionality, and significantly raise your home’s value. Whether through the elegance of crown molding, the rustic charm of exposed beams, or the innovation of smart materials and lighting, upgrading your ceiling can deliver both aesthetic and financial returns.

By giving thoughtful attention to this overhead canvas, homeowners not only maximize space and beauty but also distinguish their property in an increasingly competitive housing market. So the next time you’re planning a renovation, look up—there’s incredible potential waiting just above your head.

How to Add Personality with Home Maintenance & Renovations

How to Add Personality with Home Maintenance & Renovations

When it comes to creating a home that feels genuinely yours, personality plays a vital role. A house may have strong bones, modern features, and a clean layout, but without a touch of individuality, it can feel cold or generic. That’s where thoughtful home maintenance and renovations come into play. These aren’t just about fixing what’s broken or updating what’s outdated—they’re also opportunities to inject charm, style, and authenticity into your living space. The goal is not just to maintain a structure, but to create a sanctuary that reflects who you are.

Start with a Vision That Reflects You

Before lifting a hammer or picking up a paintbrush, it’s essential to ask: What kind of atmosphere do you want your home to evoke? Are you drawn to rustic warmth, modern sleekness, or eclectic creativity? Home maintenance and renovation projects that lack a personal vision often end up feeling soulless. Consider your personality traits—are you playful, minimalistic, vibrant, or serene? Translate those traits into design elements.

For instance, if you’re someone who thrives in calm environments, lean toward soft, neutral palettes, natural materials, and clean lines. If you’re bold and expressive, consider vivid accent walls, dramatic lighting, or vintage finds. The magic happens when your home begins to reflect your quirks, tastes, and lifestyle—making every room feel intentional.

Customize with Color and Texture

One of the simplest and most effective ways to add personality to your home through renovations is by playing with color and texture. A fresh coat of paint is an affordable maintenance task that can transform an entire room. But don’t just stick to white or beige because they’re “safe”—go with shades that resonate with you. Deep blues, rich greens, or even vibrant reds can bring energy and emotion to your space.

Beyond color, texture plays a huge role in creating depth and uniqueness. Exposed brick walls, reclaimed wood beams, or textured wallpaper can all add dimension and style. When maintaining your home, consider ways to add or preserve natural texture rather than covering it up. That old wood floor might just need a good polish instead of replacement. And when choosing new materials, don’t be afraid to mix and match—linen with velvet, matte finishes with glossy ones, or metal with stone.

Revitalize Forgotten Spaces

Home maintenance often focuses on the essentials—leaky faucets, cracked tiles, or outdated fixtures. But while you’re tending to those necessary repairs, why not breathe new life into underused or overlooked areas of your home?

That awkward corner in the hallway? It could become a reading nook with the addition of a built-in bench and a few custom shelves. The space under the stairs? With a little carpentry, it might transform into a wine rack, a pet nook, or hidden storage. Renovations don’t always have to be large-scale; sometimes, it’s these smaller, clever updates that carry the most personality.

Even your garage, laundry room, or basement can be repurposed into spaces that reflect your lifestyle. A laundry room with patterned tiles, floating shelves, and a splash of color can make a mundane chore feel more enjoyable. A garage with wall-mounted organizers, hobby space, and customized lighting becomes more than just a storage zone—it becomes part of your home’s story.

Incorporate Personal Art and DIY Projects

A home that feels like “you” is one that tells your story through the objects within it. During renovation or maintenance work, consider carving out space for art, photos, and DIY projects that have personal significance. Instead of mass-produced prints, display artwork made by you or loved ones. Frame travel photos, children’s art, or even handwritten recipes passed down from generations.

If you’re handy, try incorporating some DIY upgrades. A handcrafted headboard, a repurposed cabinet turned vanity, or a mosaic tabletop can be both a functional addition and a conversation starter. The process of creating something with your own hands deepens your connection to the home, making it more than just a place to live—it becomes a reflection of your efforts and creativity.

Update Fixtures with Flair

During regular home maintenance, replacing outdated hardware, faucets, or lighting fixtures is often on the list. But instead of choosing default options, treat each update as a chance to inject character into your surroundings.

Opt for cabinet knobs in unique materials like stone or antique brass. Swap out a generic chandelier for one that makes a sculptural statement. Use pendant lighting in the kitchen or vintage sconces in the hallway to elevate otherwise standard spaces. These small details might seem insignificant during the renovation process, but they accumulate to create a cohesive and personalized aesthetic throughout the home.

Celebrate Architectural Quirks

Some homes come with features that feel a bit strange—slanted ceilings, oddly shaped rooms, or asymmetrical windows. Rather than seeing these as flaws to be hidden, use your renovations to highlight them as character-rich aspects of your space.

A sloped ceiling can become a charming canopy with string lights or painted beams. An unusual room shape can be maximized with custom furniture or built-ins that make sense of the space. Even old trim or molding can be revived with paint and restoration, rather than being ripped out and replaced with something more generic.

These quirks are what make your home unlike any other, and emphasizing them adds personality in a way that no amount of trendy décor ever could.

Focus on Lighting to Set the Mood

Good lighting doesn’t just illuminate—it also elevates. If you’re renovating, don’t underestimate the power of intentional lighting design. Natural light is always the best starting point, so maintain and clean windows, replace heavy drapes with lighter options, and add mirrors to amplify daylight.

For artificial lighting, use layered solutions: overhead lights for general use, task lighting for reading or cooking, and accent lighting to highlight art or create ambiance. Consider dimmer switches, warm-toned bulbs, or even color-changing LEDs to adjust the mood based on the time of day or your activity. Lighting is a subtle but essential way to create emotional resonance in your home, making it feel cozy, inviting, or energizing as needed.

Integrate Meaningful Materials

Renovations offer the perfect moment to choose materials that resonate with your values or history. If sustainability matters to you, choose eco-friendly flooring, recycled countertops, or locally sourced wood. If you have a cultural heritage you’d like to honor, integrate patterns, tilework, or materials that reflect it.

These material choices not only shape the look and feel of your home, they also bring deeper meaning to your renovations. A backsplash of hand-painted Moroccan tiles or reclaimed barn wood from a family property turns your home into a living memory. When home maintenance aligns with your identity, even routine upgrades take on sentimental value.

Curate with Intention

Once your renovations are complete, avoid cluttering your space with random accessories. Instead, curate thoughtfully. The décor you choose should have purpose, whether functional, emotional, or aesthetic. An antique mirror passed down from your grandmother, a stack of books that changed your perspective, or a handmade ceramic vase—these pieces breathe life into a room.

During the maintenance phase, use the opportunity to re-evaluate what’s on display and what can be tucked away or replaced. Sometimes, less is more. Giving space to items you truly love allows them to stand out, while also preventing visual chaos.

Keep Evolving Your Space

Personality isn’t static, and neither is your home. As your life changes, your space should evolve with you. Annual maintenance check-ins are the perfect time to not only check for repairs but also reflect on what still works for your lifestyle and what doesn’t.

Maybe the reading nook you loved last year doesn’t get much use anymore—but your new hobby in painting needs a better setup. Perhaps your minimalist kitchen layout is no longer working as your family grows. Renovation doesn’t have to be a one-time overhaul—it can be a series of gradual, thoughtful updates that keep your space aligned with who you are becoming.

Make It Yours

Adding personality with home maintenance and renovations is not about copying trends or creating a showroom-perfect house. It’s about making design decisions that are rooted in authenticity, storytelling, and comfort. Your home should be a place where you feel fully yourself, surrounded by elements that inspire and soothe you.

Whether you’re fixing a leaky pipe, updating a backsplash, or reimagining your entire floor plan, remember that every project is an opportunity to weave a bit more of you into the foundation. When the dust settles and the paint dries, what should remain is not just a better-functioning home—but one that speaks in your voice.